

The Tile Bluetooth Locator is an amazing little device. My first Tile was from my wonderful wife purchased during the run of the original KickStarter and the second was given as an award by my employer (VMware). Unfortunately, the tile has been designed with planned obsolesce of 1 year after purchase. Considering the design constraints, this really not that bad. There isn’t space to add much more of anything without sacrificing battery life or increasing the size of the device. My tile had reached the end of its life and would no longer power on and was listed as not found for nearly a week within the Tile App on my iPhone. I really didn’t want to throw it out, there’s a lot of good technology in that little package. What to do with it? Let’s recycle it and keep it out of the landfill!
My wife and I (or as she claims, I) lose the TV remote all the time. A week doesn’t go by without either of us looking for it. Wouldn’t it be great to have a tile be embedded into the TV remote?
Embedding Tile into TV Remote
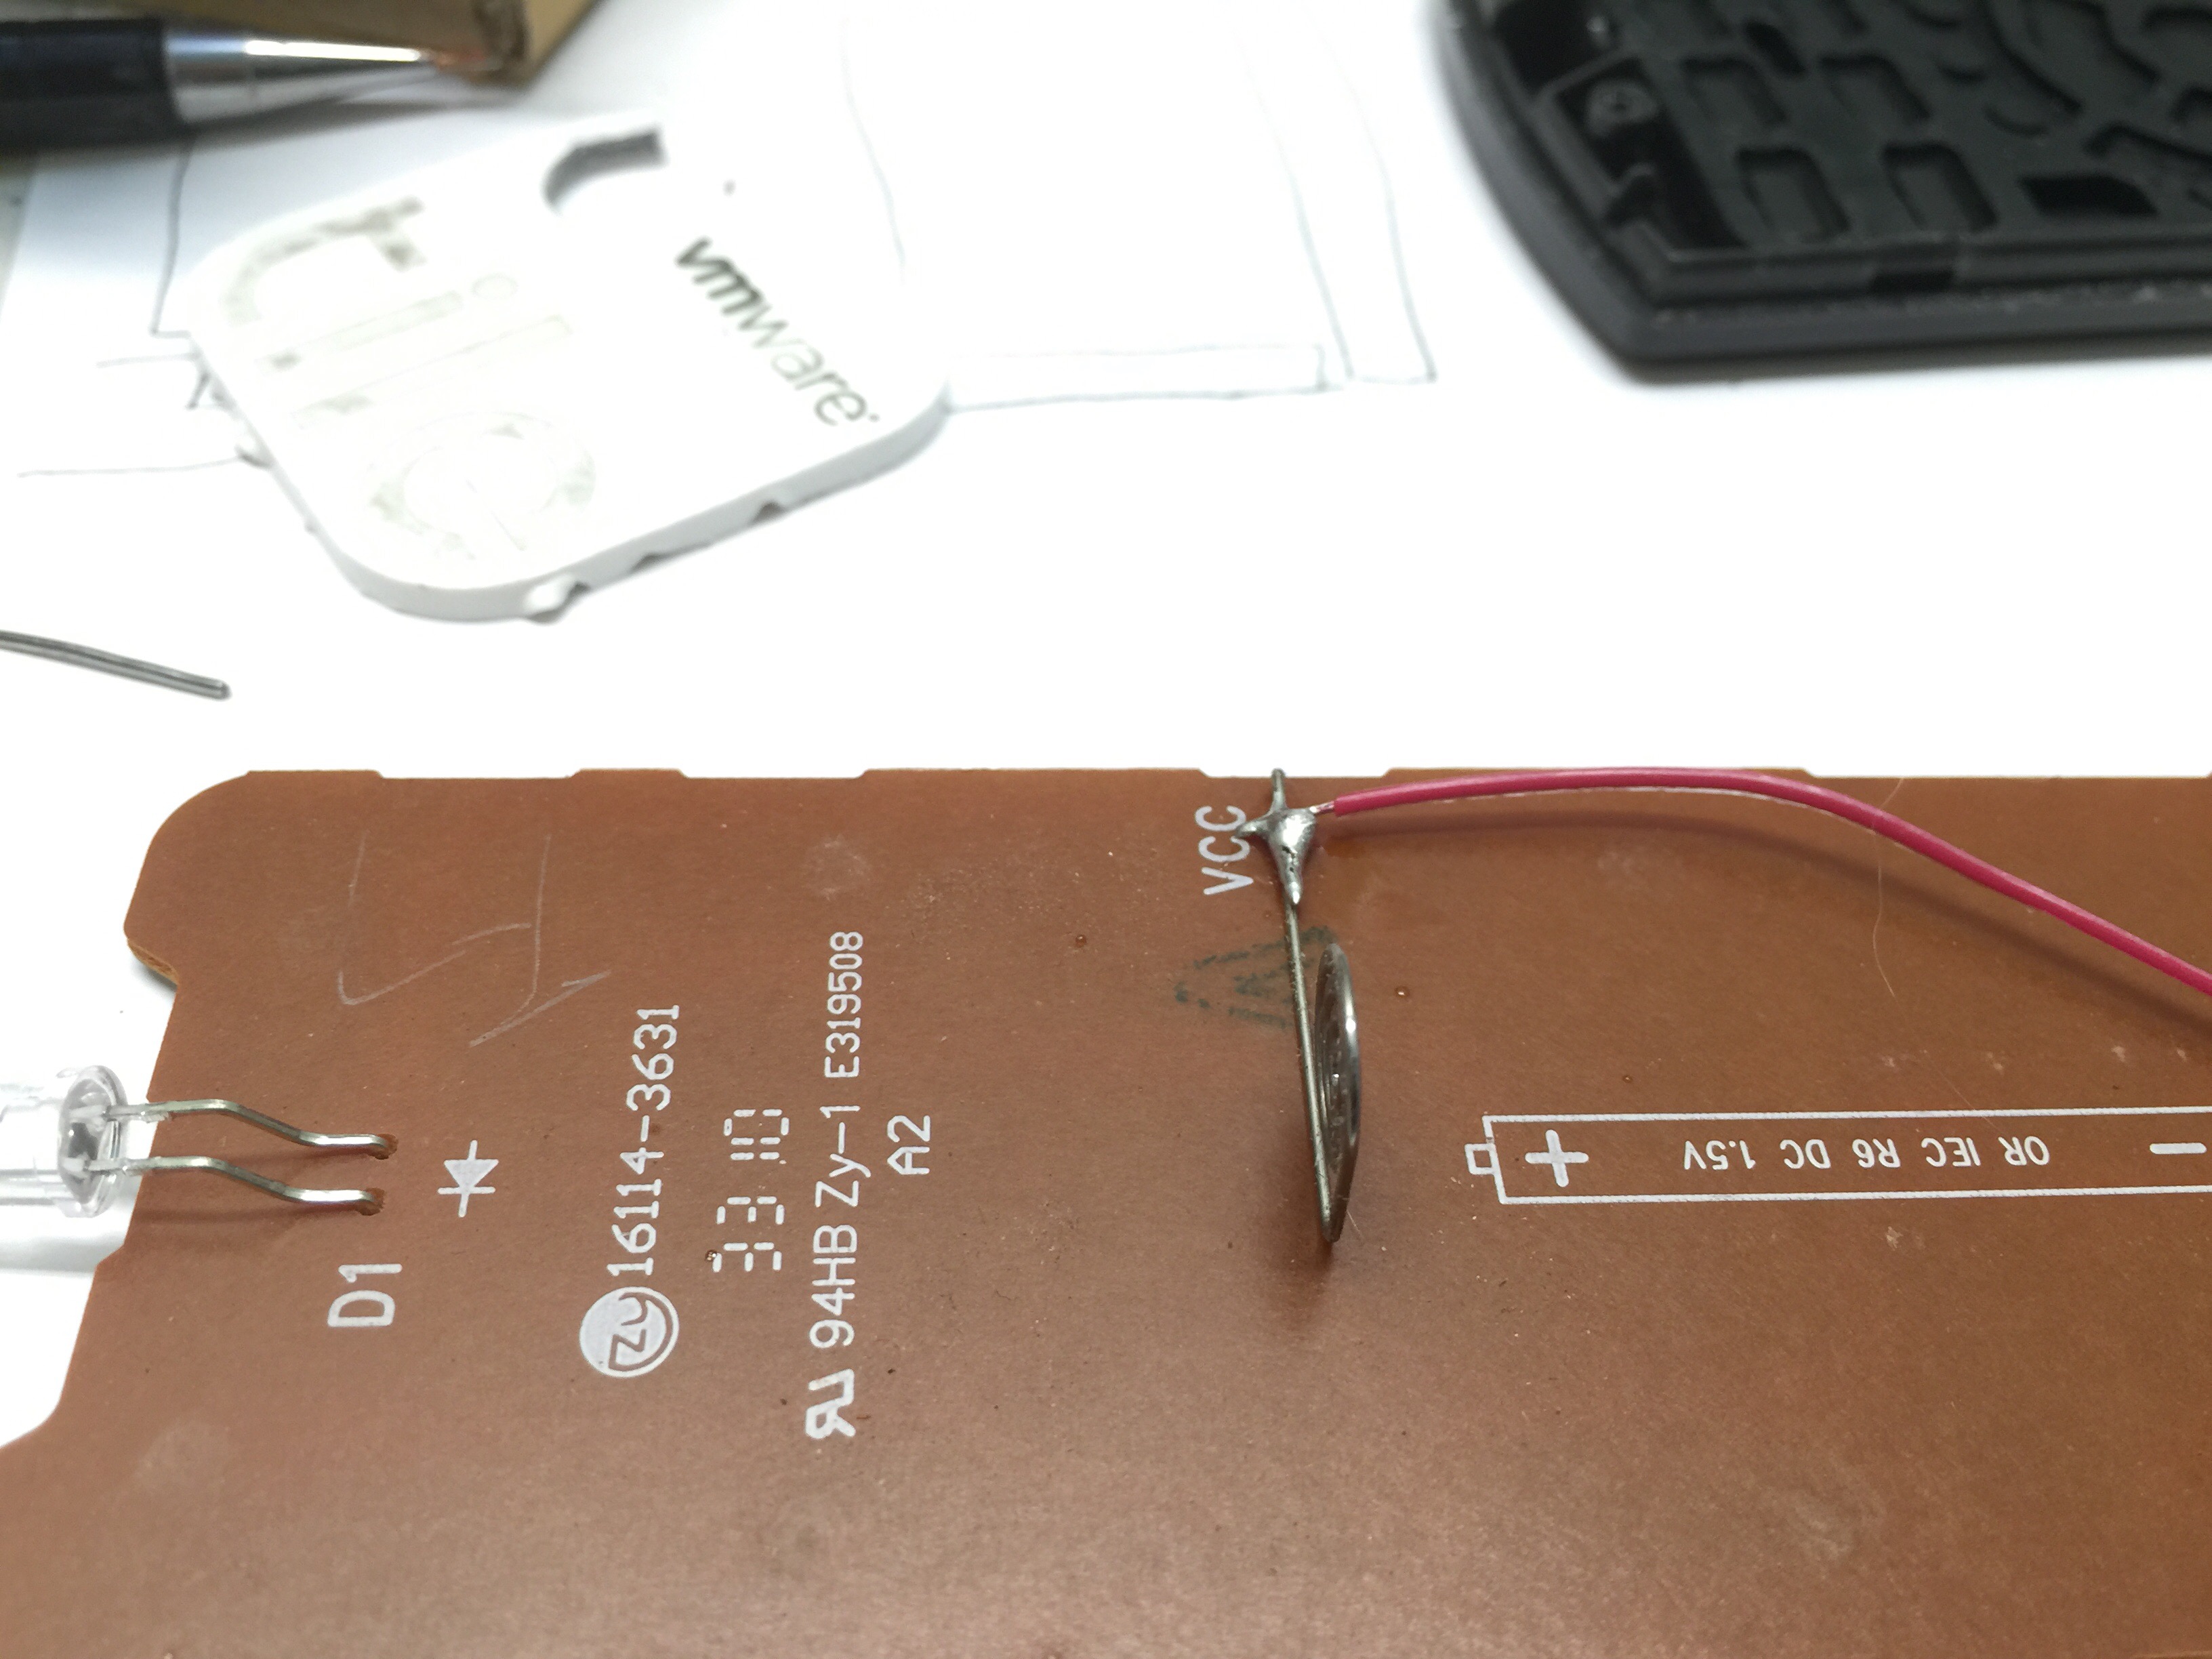
- The remote to our 5 year old Panasonic TV was opened. There were just four screws holding it together.

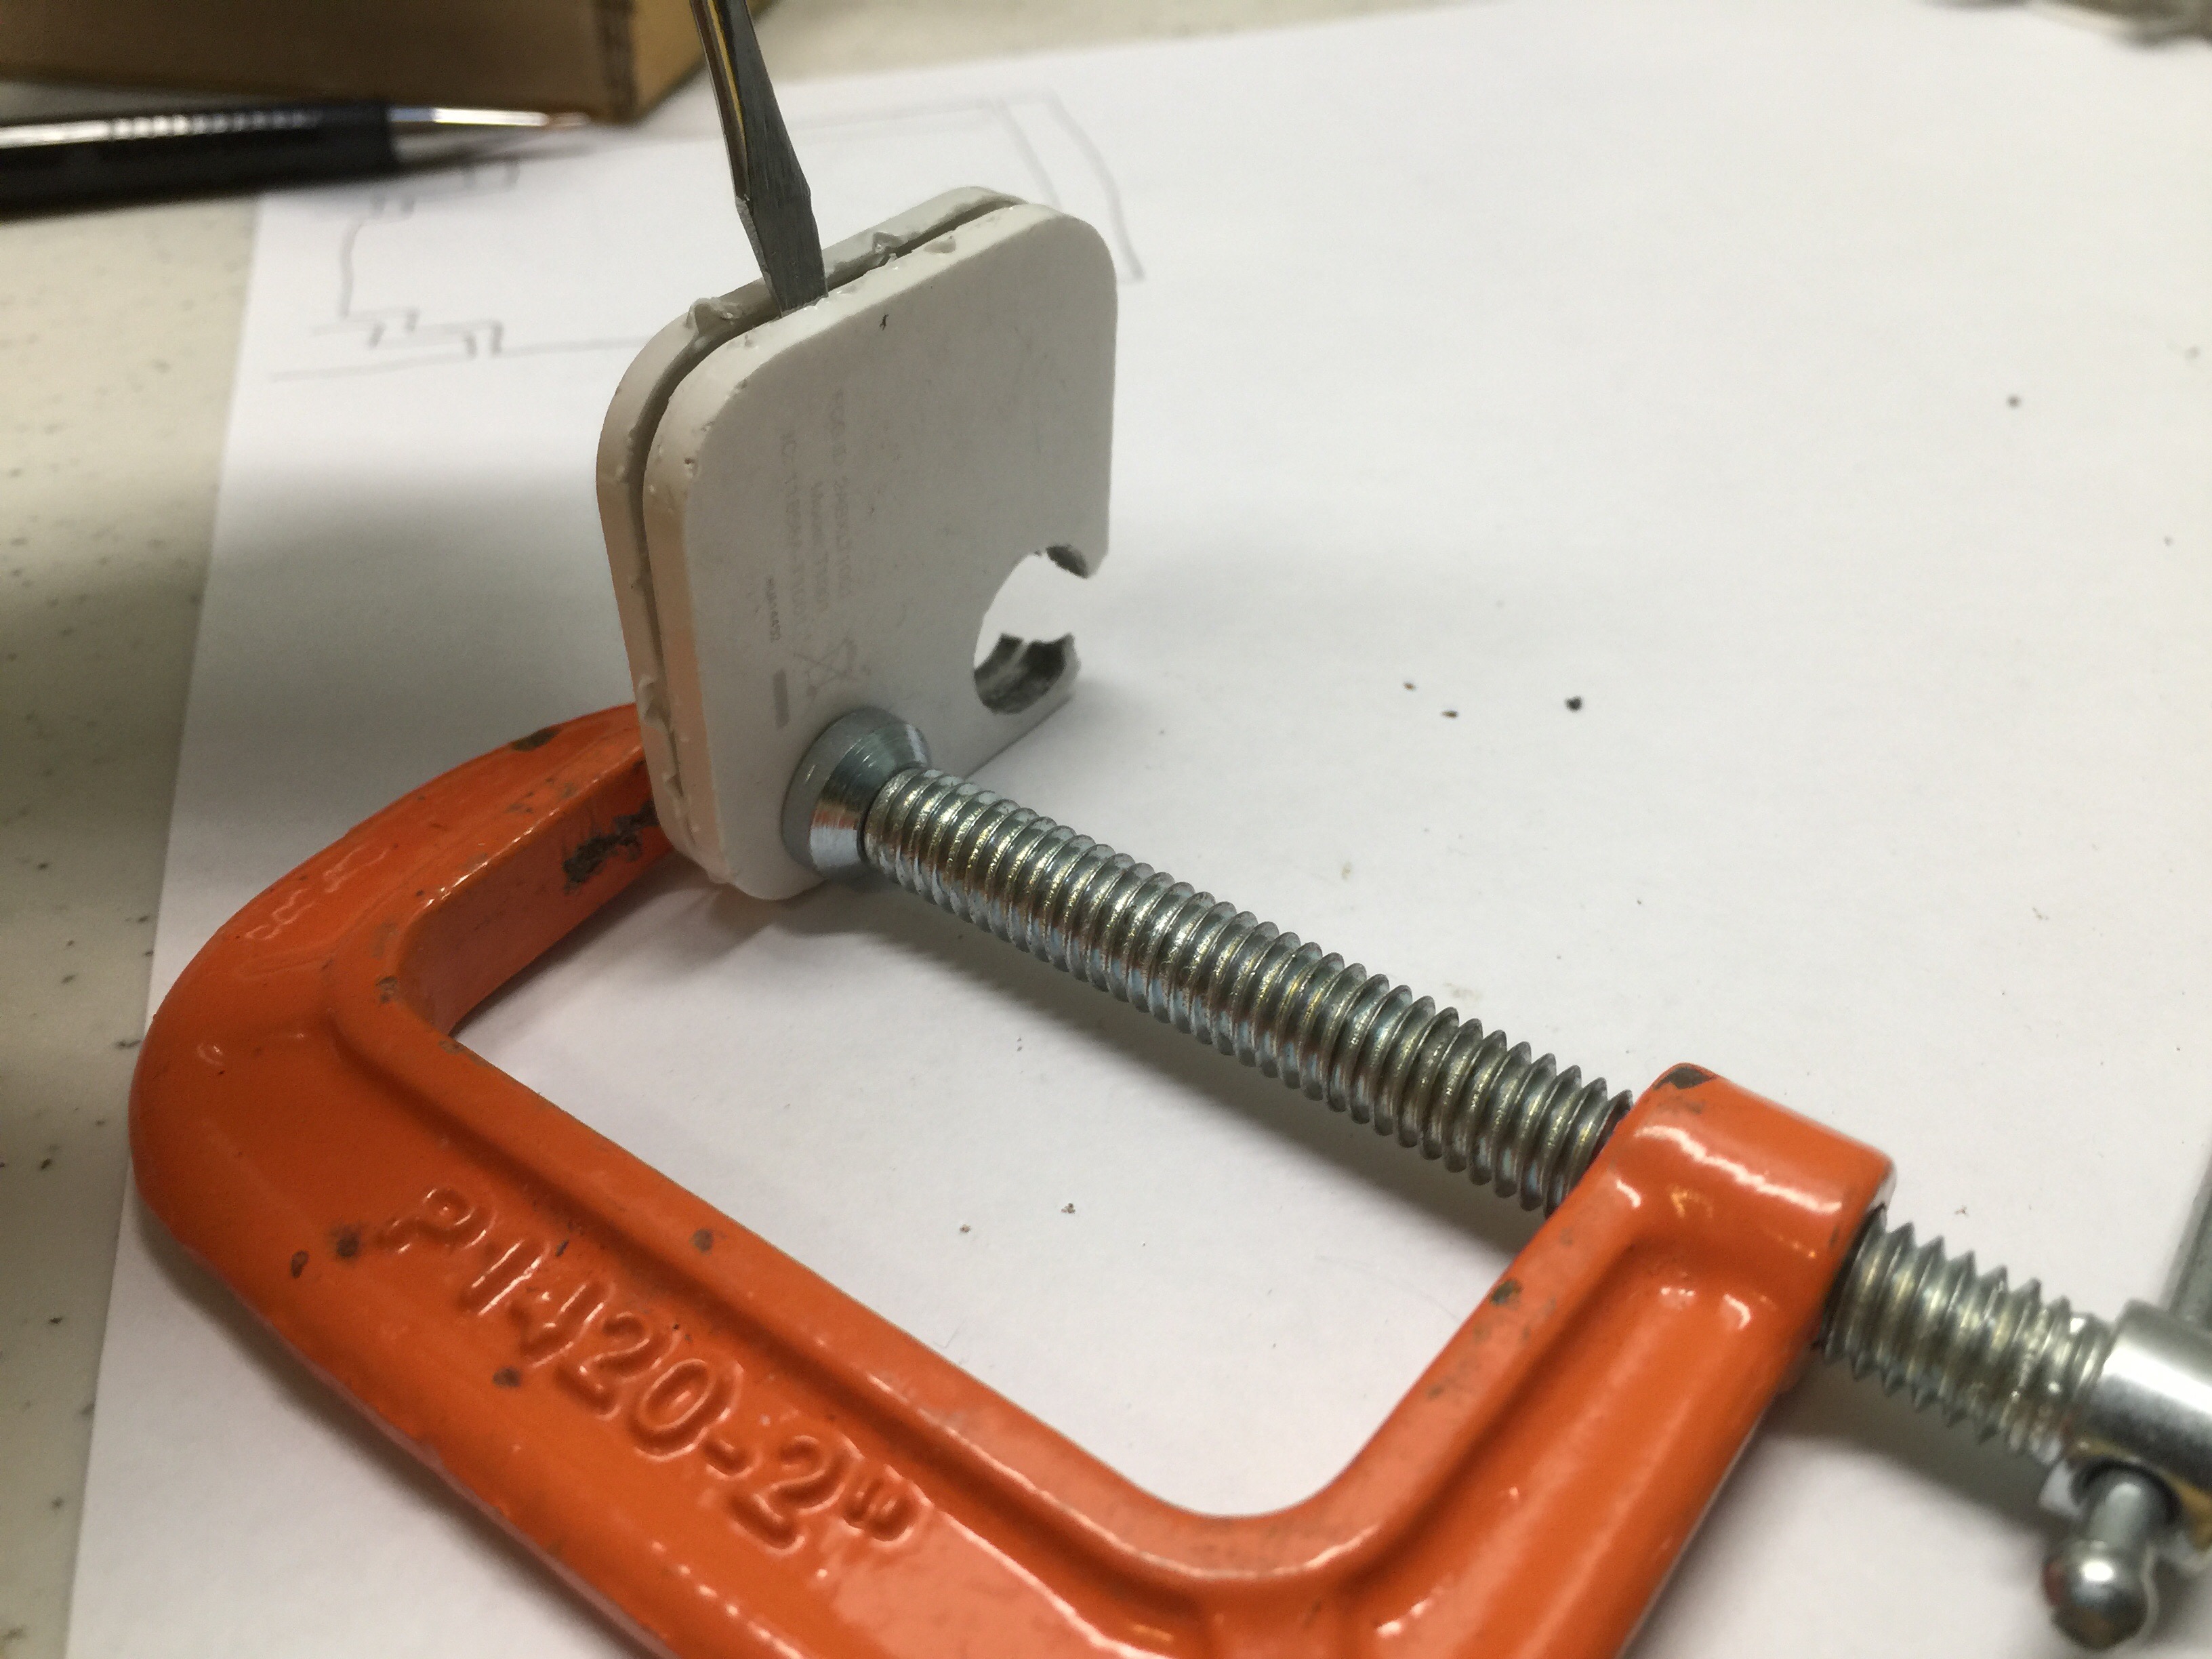
- To open the Tile, it’s held with a small clamp while a screw driver is run through the glued seam. The Tile could probably be held in a bare hand, but I didn’t want the screw driver to slip and cut my fingers. The tile opened with very little effort. In the picture, you’ll notice a notch removed from the key hole. This was from an early failed attempt to pry it open with a pair of pliers. Using a screw driver was much easier.
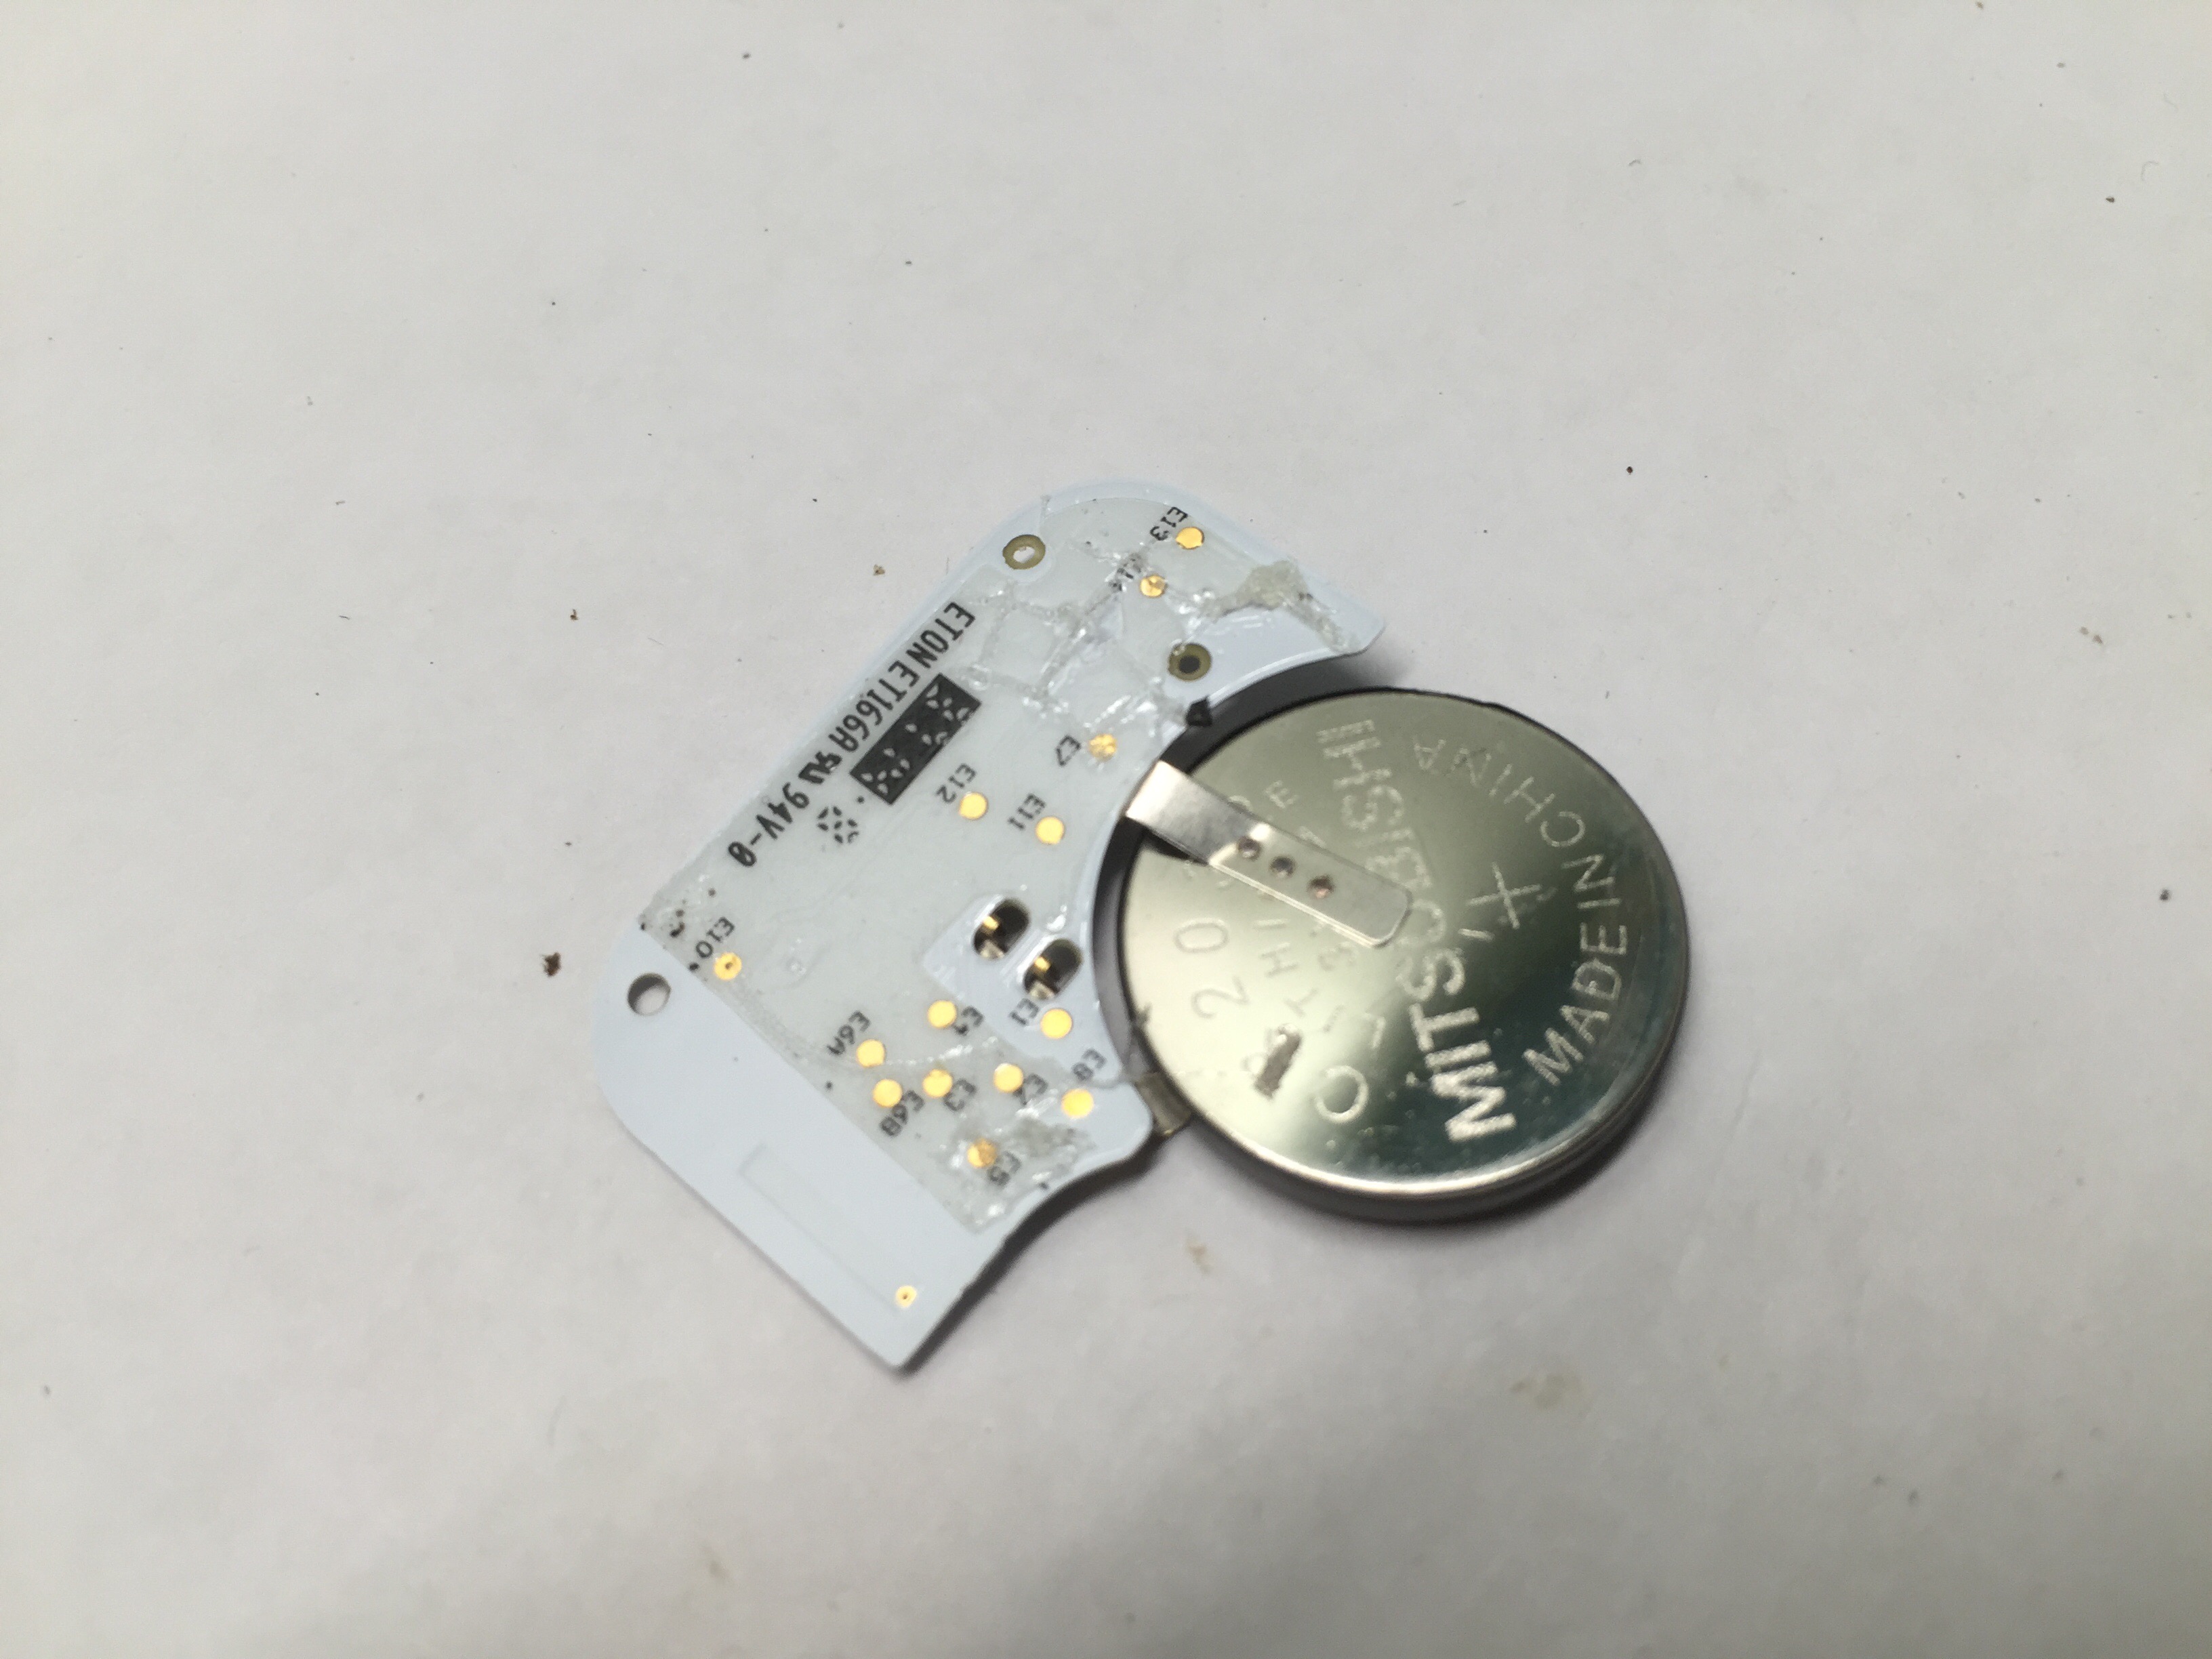
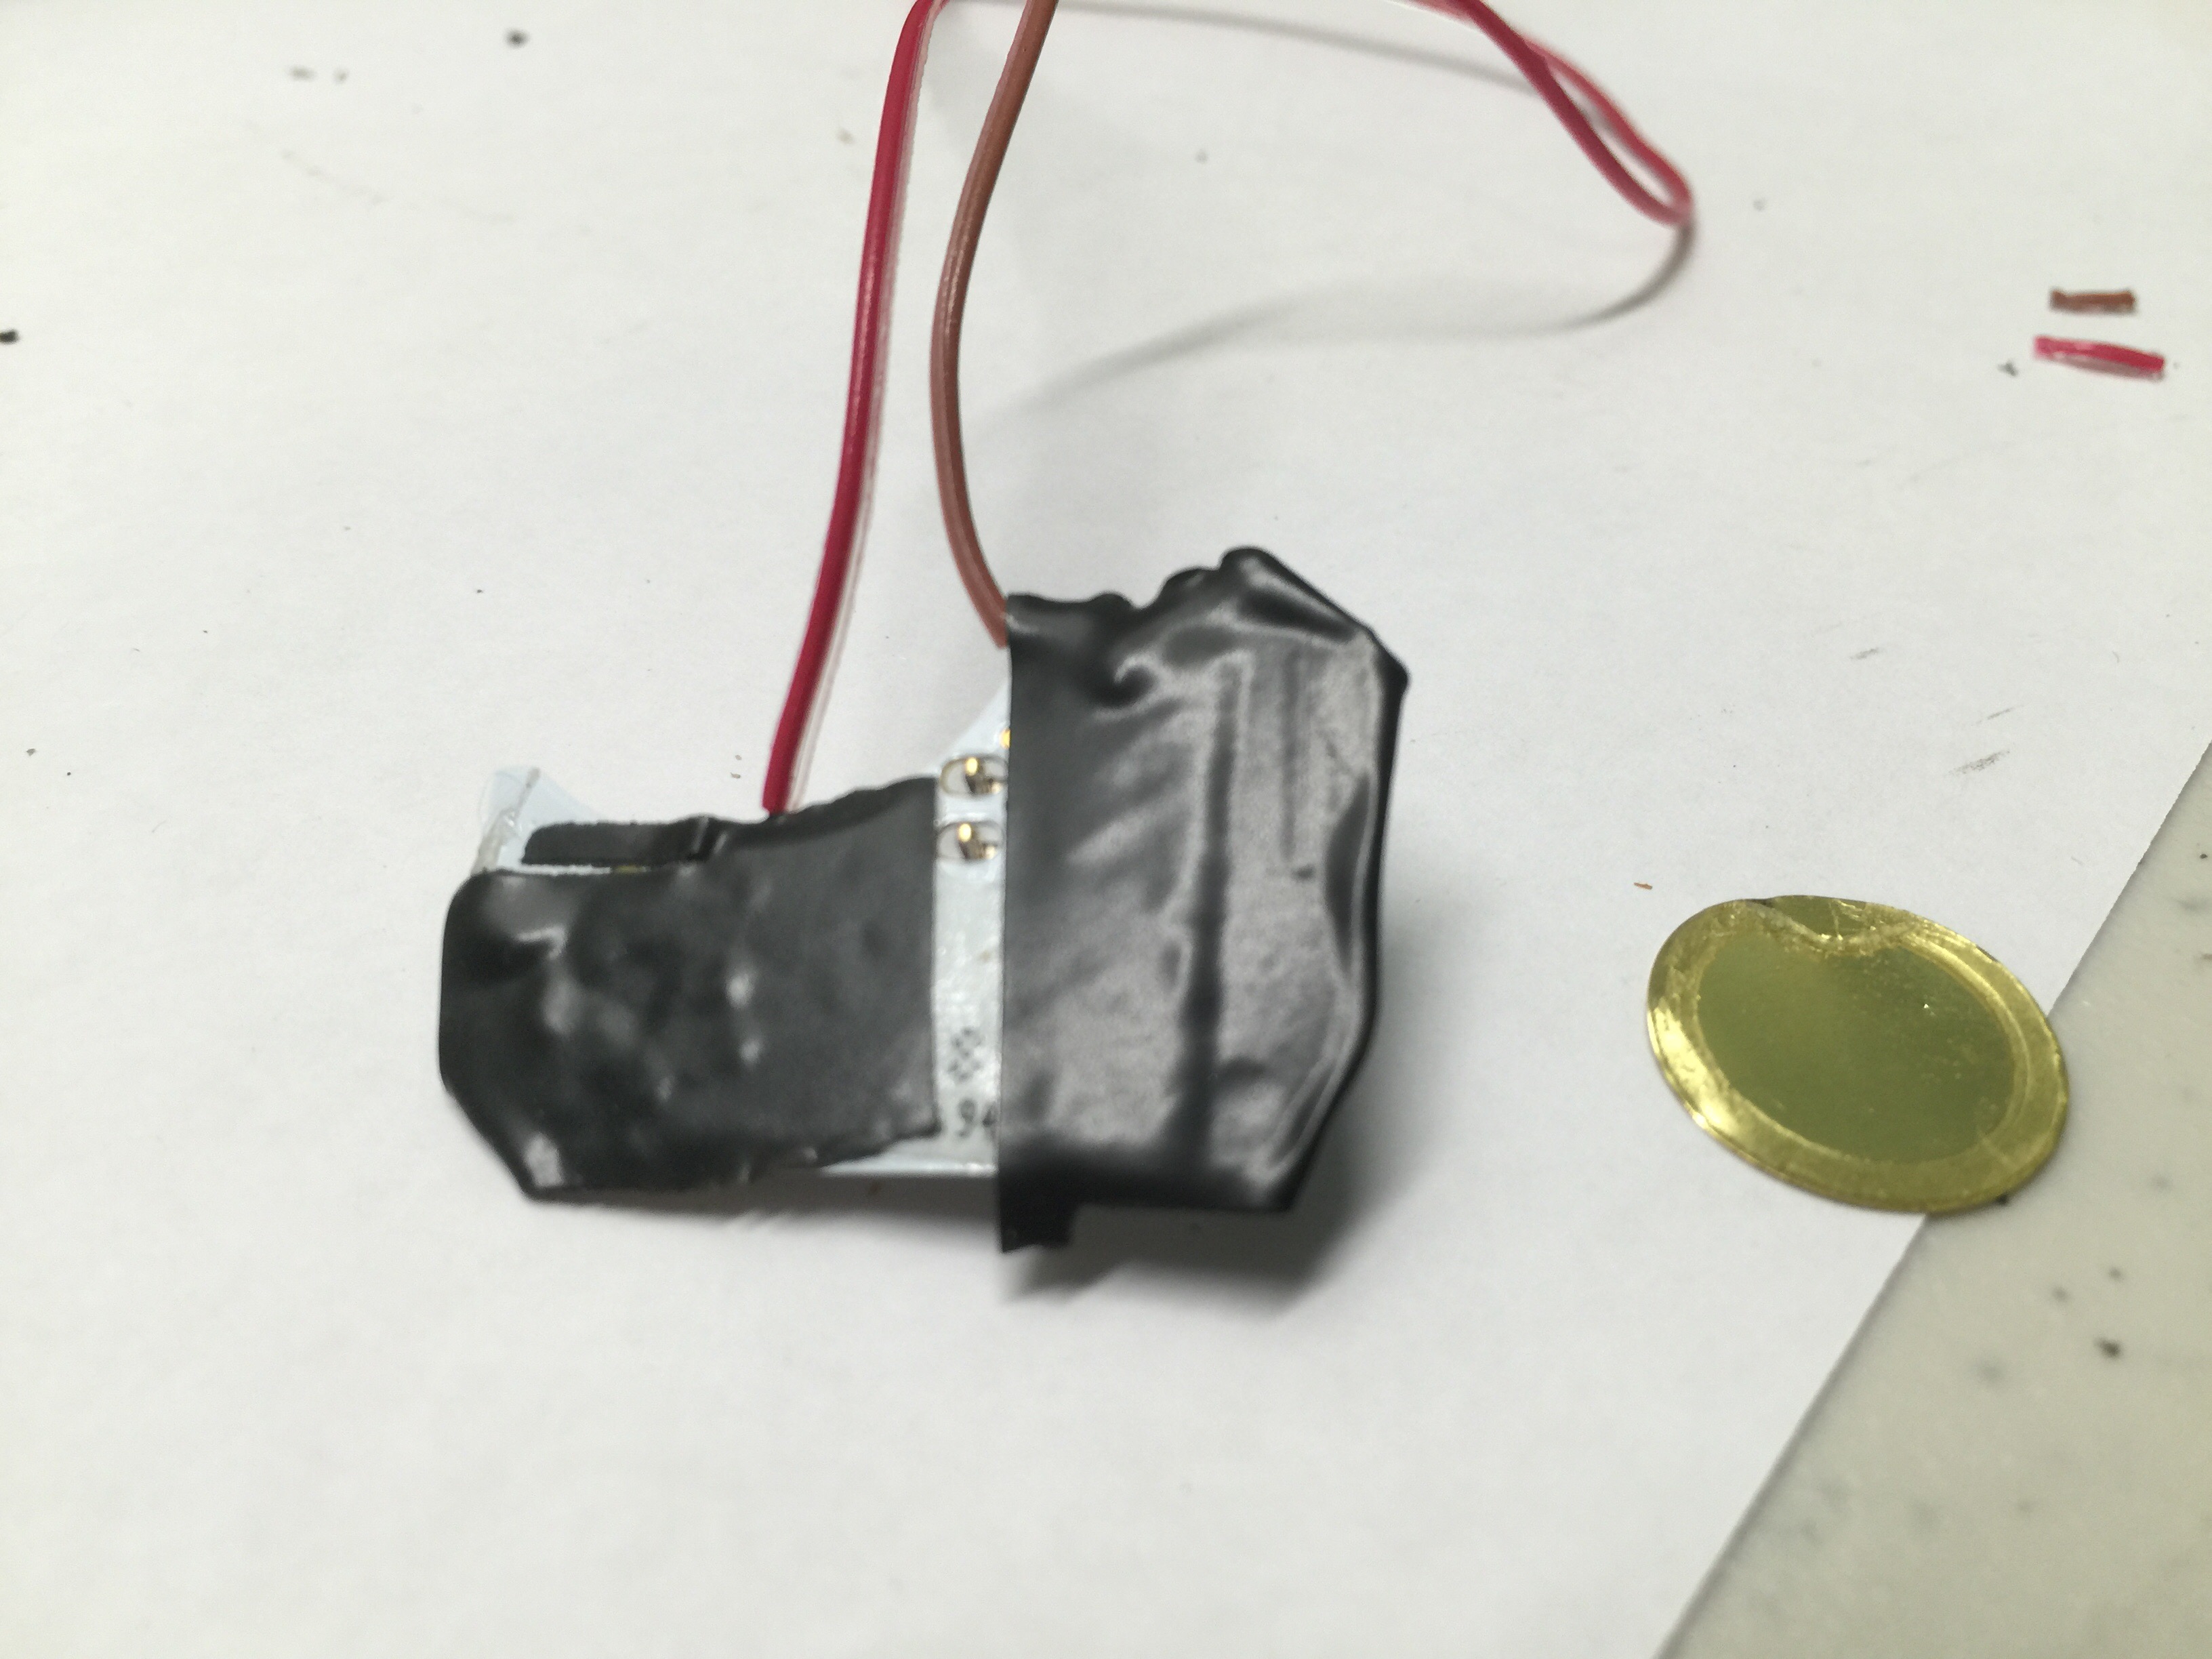
- The single largest component of the Tile is the battery and this clearly defines the form factor of the package. The battery is spot welded onto the battery holder and the holder is soldered onto the PCB.
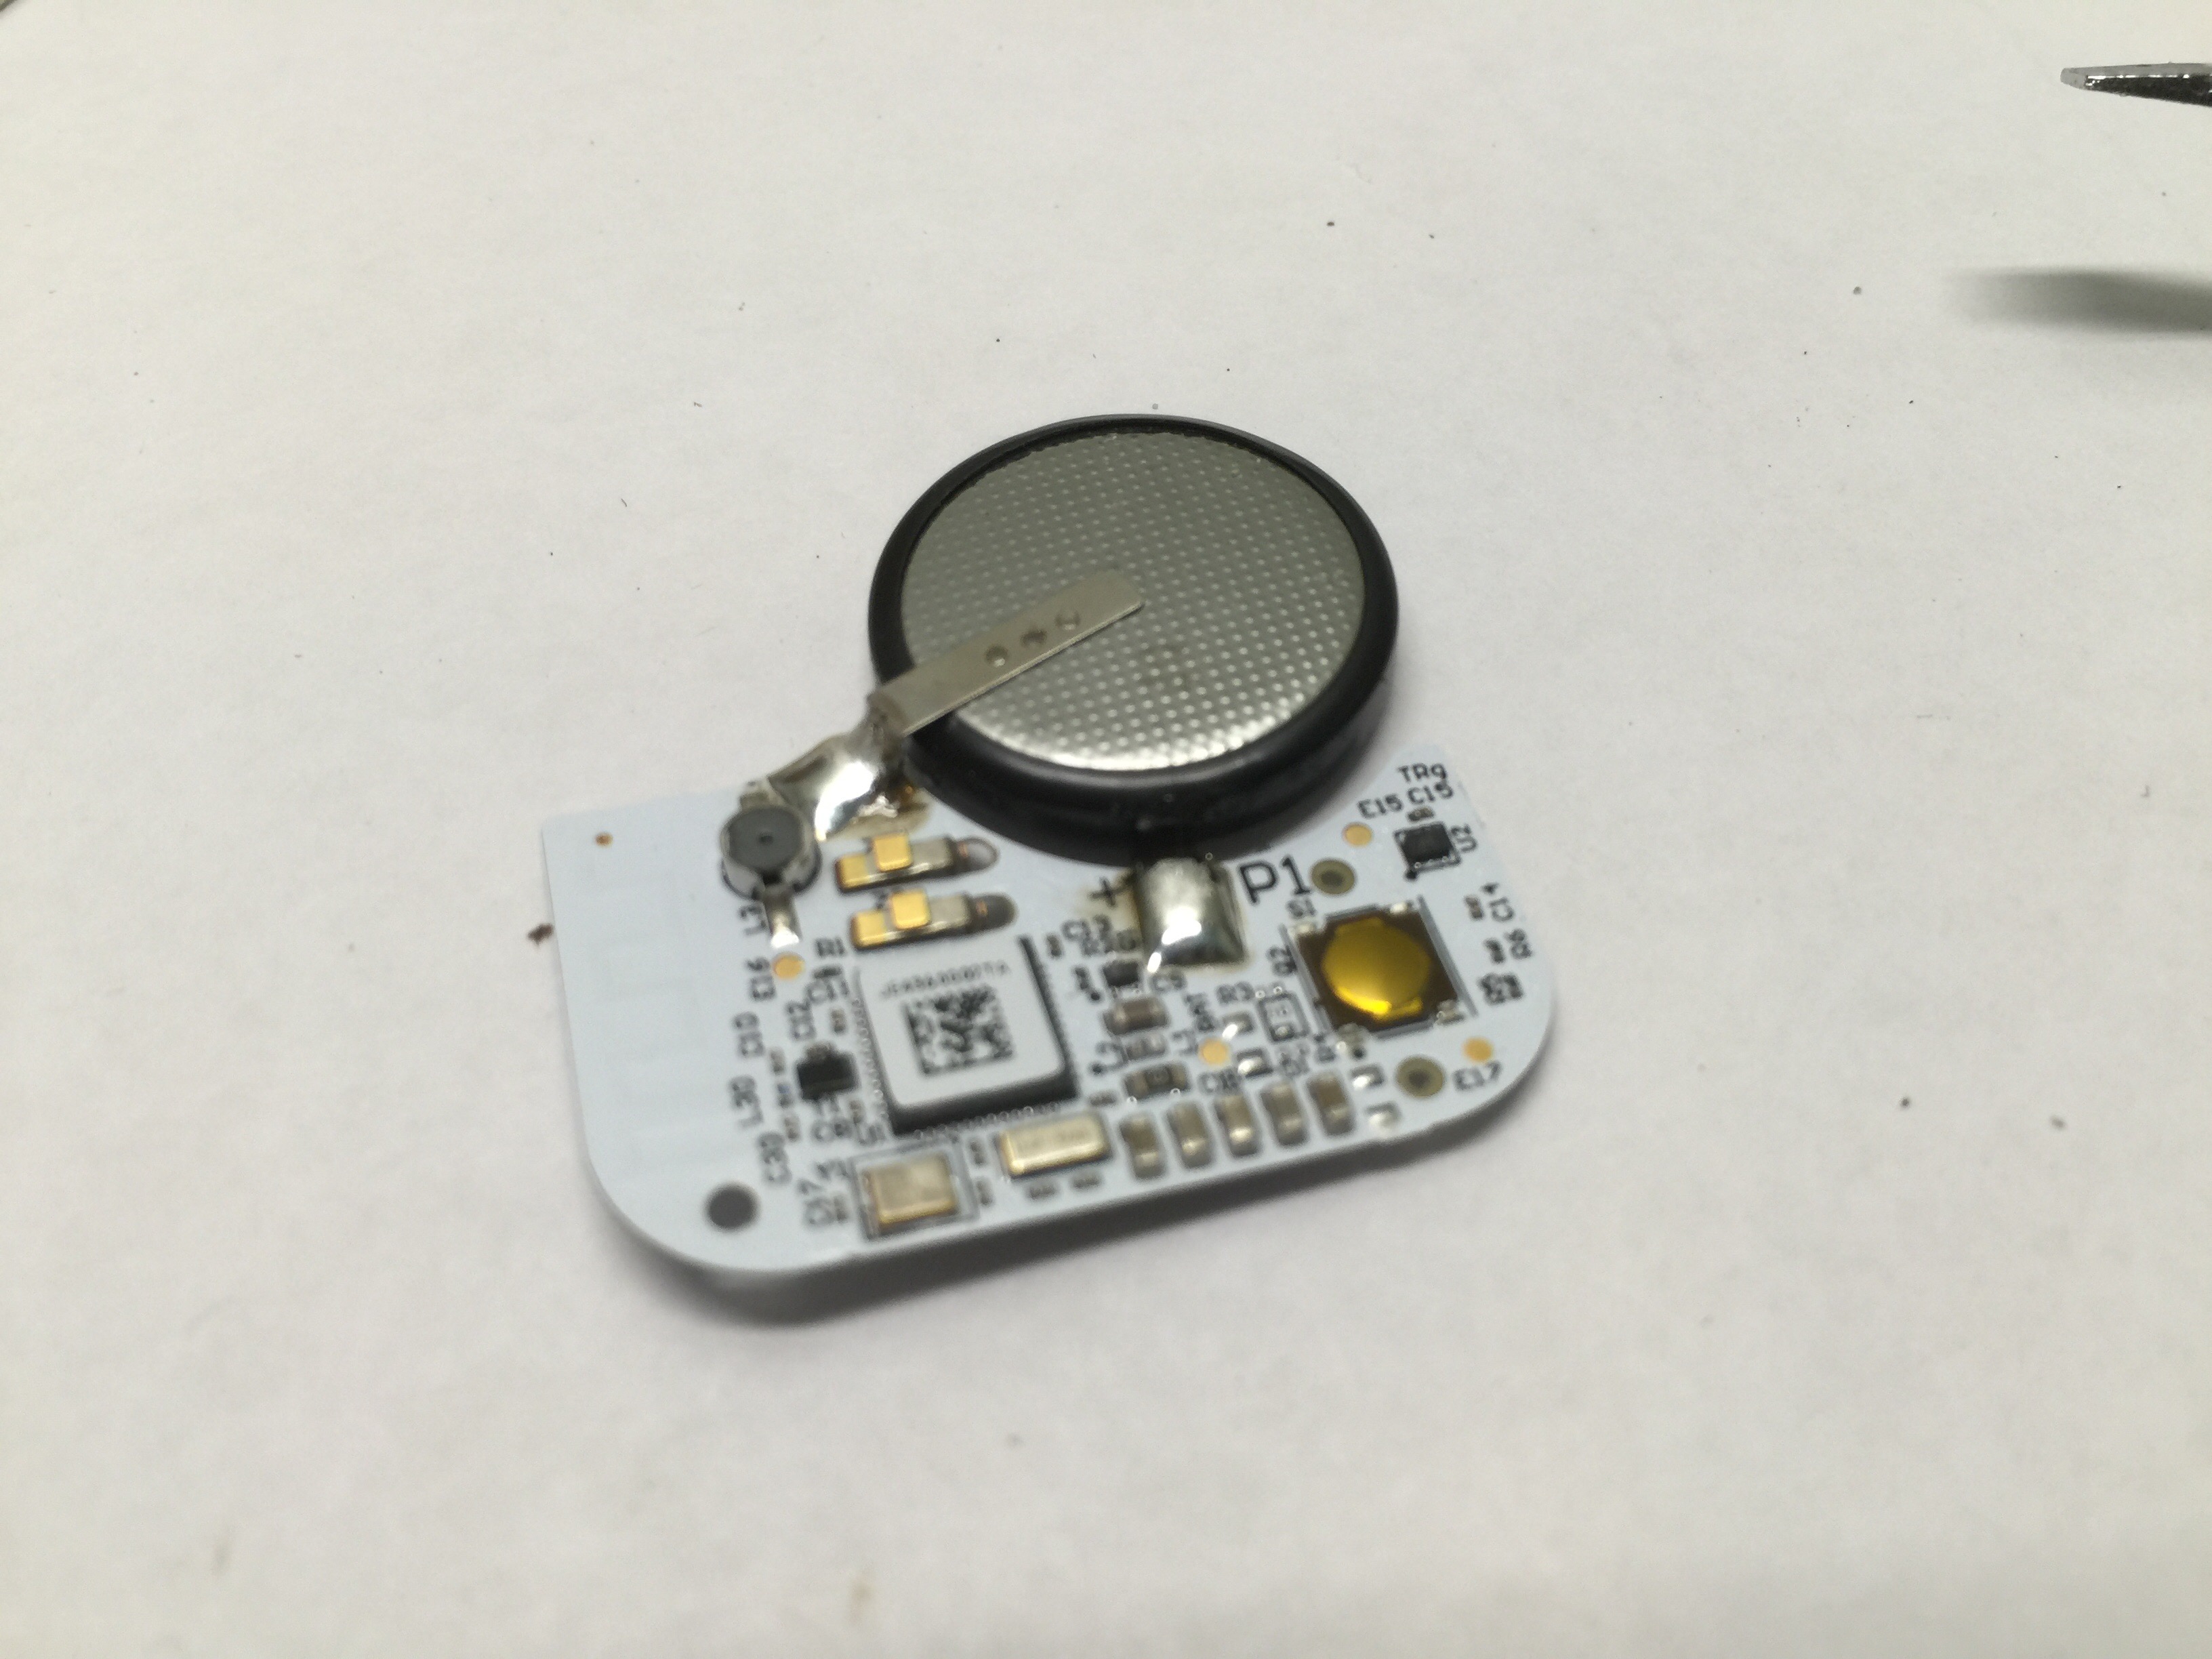
- On the bottom of the PCB are two springs that press onto the piezo speaker. Someone on the Tile team is well versed on Designing for Manufacturability. Well done Tile!
- The battery was desoldered and two 28 gauge wires soldered in its place. The wires are actually just individual strands from ribbon cable I had laying around. To make sure it still worked, the PCB was powered off my bench supply set at 2.8v with a current limit of 10ma. My power supply has a resolution of 1ma and at no time did the tile caused the power supply to display any more than 0ma. At some point, I’d like to perform current measurements at either the nano amp or pico amp scale. It’ll be great to know just how little current this draws at various operating modes.
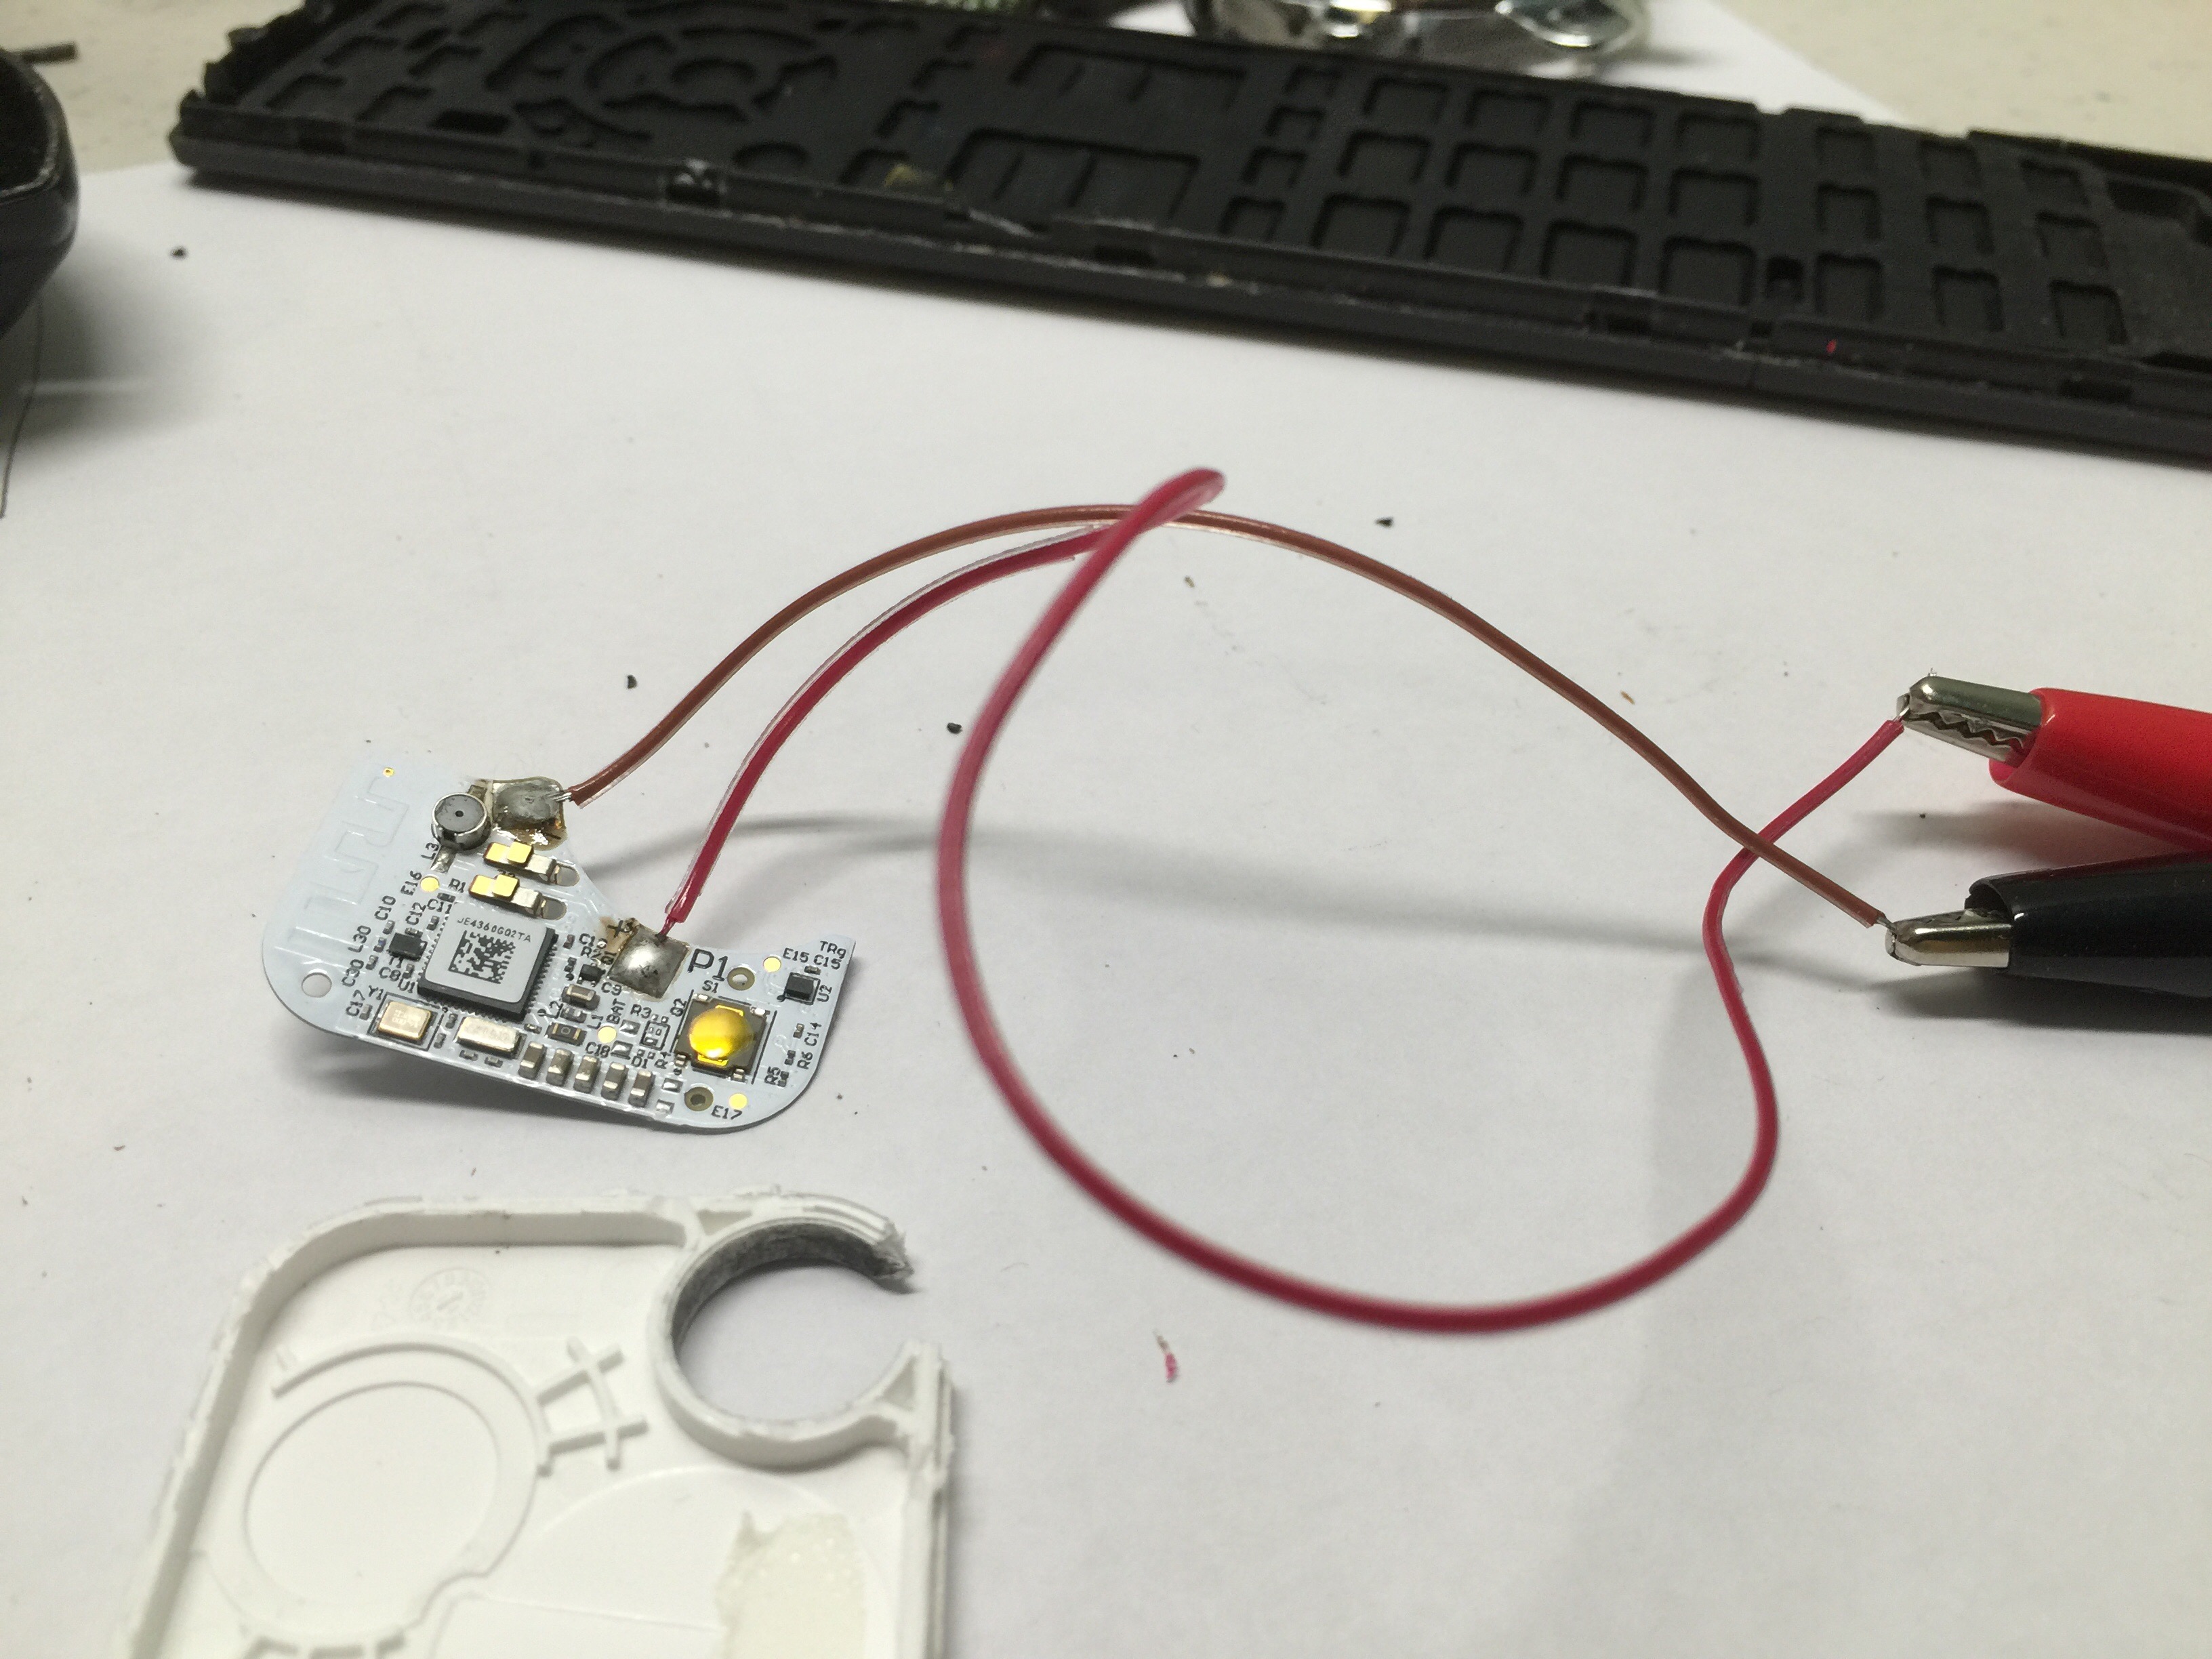
- Considering the original construction, it’s probably unnecessary to insulate the test pads on the bottom of the Tile, but two 1.5 cm pieces of black electrical tap is cheap insurance. This is going to be wired in parallel to two AA batteries which has a lot more energy than the CR2032 battery that it was shipped with by the OEM. Paranoia is a good thing.
- My original instinct was to solder wires onto the springs and then solder those onto the piezo speaker, but then I realized that’s a bit of over engineering. The engineers at Tile provided spring contacts and why not use them? The piezo speaker was instead just taped into place. Couldn’t be easier!
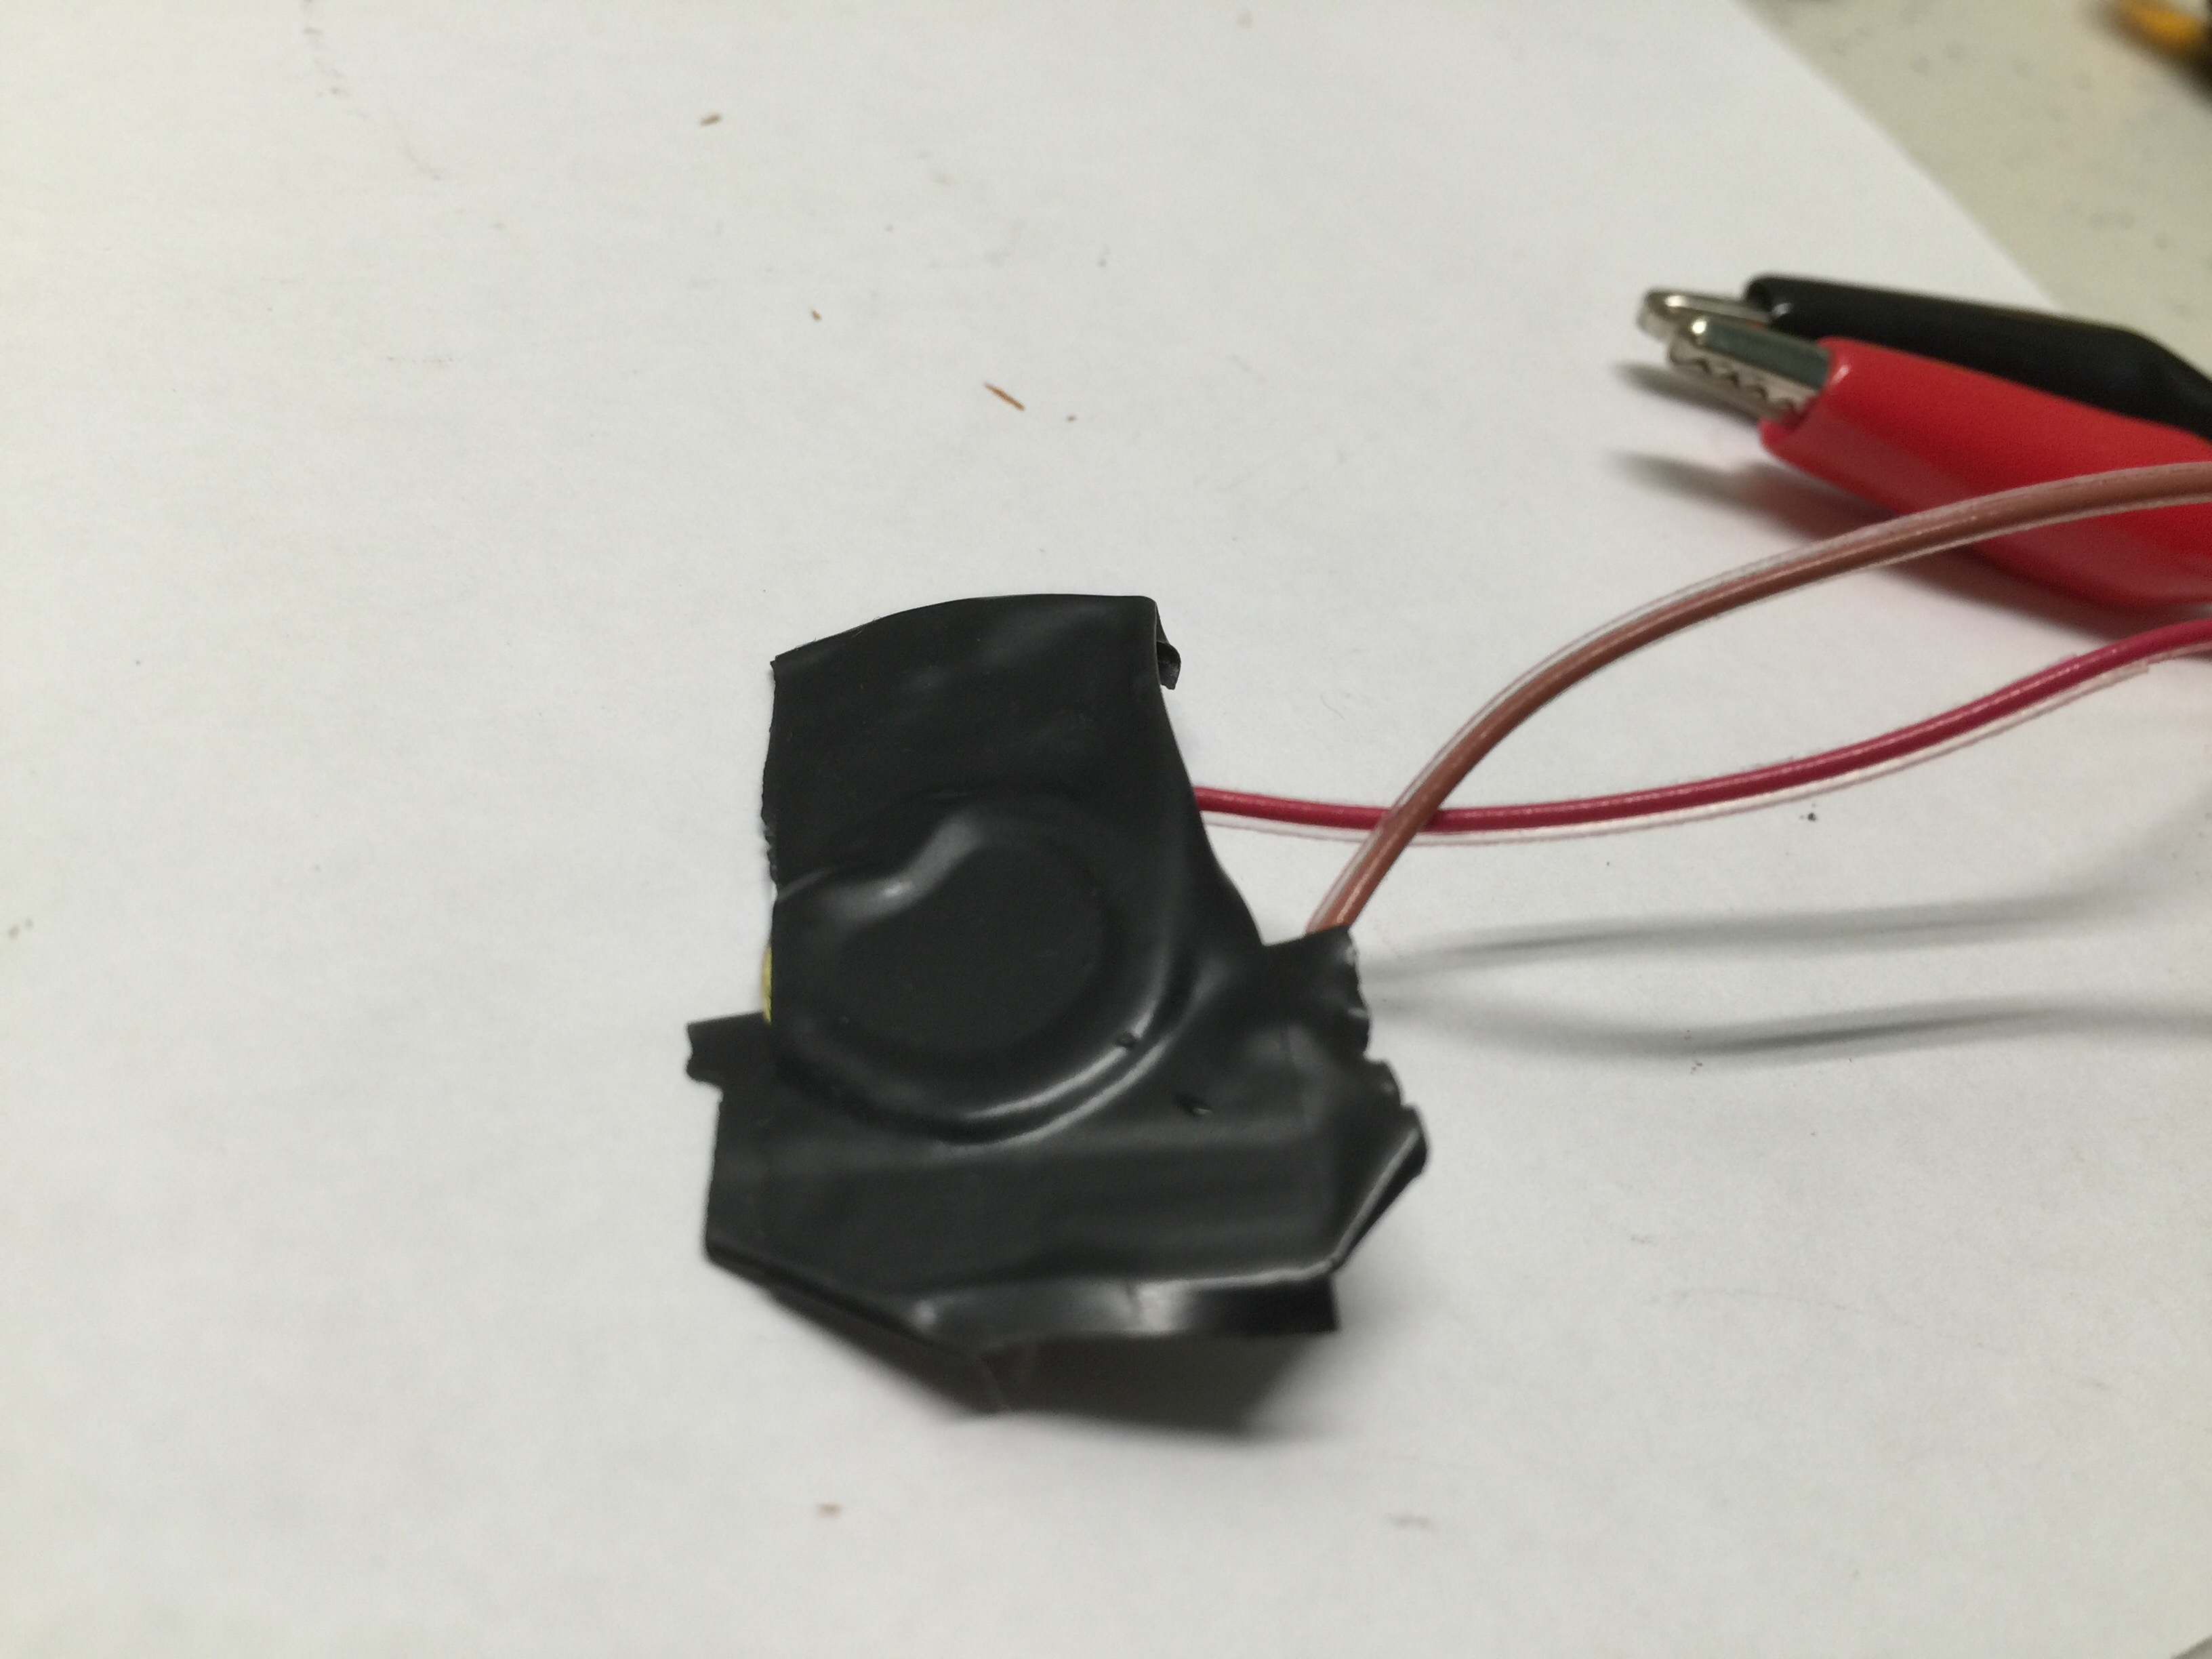
- The power lines coming from the Tile was soldered onto the battery terminal pads on the TV Remote’s PCB. The tile was tucked into the remote and the remote was reassembled.
The whole process took about 30 minutes or half the time it took to write this article. In hind sight, it would have been nice to use a Rev2.0 Tile which has the louder speaker. I may do this when it’s time to swap out the Tile in my car.
Cheers!

Does this still register in the Tile App. I have a feeling that Tile stopped allowing old tiles to work with the app after 14 months or so, no matter if the battery is good or not. Let me know. Thanks!
The write up was authored in April and it’s now December, the tile is still registered in the Tile app and works like a charm.
– Jm
I followed your procedure to put a tile in my Tivo Slide remote. It works, but after about two minutes it plays a short song and seems to shut itself down – it stops working and no longer id’s seen by the app. If I remove the remote batteries for a minute or two and put them back in, the tile will play a song, work for a couple of minutes, then “shut down” again. Any idea what might be going on? Thanks.
I have not seen that behavior. I’ll update the post in a month when it’s time to swap out to the newer version of the tile.
Hi, I am seeing the same behavior. Tile powers up, plays a tune, then ~30 seconds later tile powers down. I theorize that there is a non-volatile bit that has cleared upon power loss (removal of the original battery). The bit cleared state indicates that the Tile has not been “registered” or “activated”… the Tile device waits for 30 seconds to allow the Tile app to activate it, with no activation the Tile “times-out” and shuts down.
Interesting enough, during this 30 second powered up window, the Tile app can still sense and find the tile, but inevitably a time-out occurs and the Tile powers down.
The Tile app will only activate Tile once in the Tile’s lifetime, I believe that the app will check online in a database for the Tile’s unique mac address. If it has seen this Tile before it WILL NOT reactivate…. I think this is maybe a purposeful behavior to avoid people from attaching 99 cent batteries and not dishing out the “big-bucks” to Tile Inc.
Thanks for posting JM, I was just considering doing this myself, but with the hopes of putting it back together intact and with a new battery for further use. Using it on the remote may be a better idea though lol. Either way its good to know it stays registered.
If you’re able to put it back together then you’re much more skilled than I. I just couldn’t figure out an elegant way to open it without it being destructive.
Another idea I had was to wire it to two AA batteries and hide it in my car that way if the car is stolen or if I forget where it’s parked, the community can help find it.