
| Read Part Two of this topic: Synology SSD Cache on External Devices – Part 2 – Forced Failure |
My Synology DS1513+ has been working great for 6 years and was a direct replacement for an old EMC NAS. The EMC was good too but the software support for a home user just wasn’t there. This is where the Synology really stood out.
A few years after I bought the DS1513+, Synology released an update to the OS to support SSD caching. The reviews of this feature were great but it required either an available internal drive bay or to use their $500 external enclosure. This device is now the center of my home network which hosts multiple websites, docker, security cameras and also the data store for an ESXi server. It’s doing a lot more than it was originally intended for.
This load has lead to rather poor performance. The five Hard Drives just can’t keep up with the rate of input/output requests. While up one night, I dug around in the /etc folder and found the configurations to allow SSD caching on externally connected drives. It’s now been running for almost a week and this NAS is new again!
This is not going to be a write up on how to enable and configure the SSD cache on your device. For that, you can read the fine manuals published by synology. This will document how to have your externally connected devices recognized by the SSD cache service.
These instructions can also be used to extend your internal volume using external drives, but that was not the intention of this implementation.
This was written for the DS1513+ but I’m confident it will work with other devices. Please write in the comments if you have successfully ( or unsuccessfully ) reproduced this yourself or have run into problems.
USB or eSATA
The NAS has both USB and eSATA ports and for my implementation, I made the conscious decision to only apply these changes to the eSATA ports for a few reasons:
- eSATA has lower latency than USB
- SMART diagnostics are only available over eSATA
- I frequently have backup drives hanging off the USB ports
- I don’t trust USB enumeration as a reliable mechanism
- I don’t trust USB for production data storage
Point 2 is important – without SMART diagnostic information, it’s not possible to determine the available remaining life of the SSD. As this diagnostic information directly influences data reliability, I consider it a requirement.
The last two points on my list are purely subjective. You may disagree with that and decide to use SSD caching with USB connected drives. I have not tried this myself, but the steps here should work for that too. Please write in the comments if you made SSD caching work with USB.
Supplies – What you need to buy
Other than an a SSD drive, you’ll need an adapter to connect the drive to the Synology. I used an inexpensive eSATA adapter from amazon that takes power from the USB port to power the drive.
- eSATA to SATA adapter $8 – https://amzn.to/2IAXXQv
Other adapters may work too, but what I’m using is cheap and since it’s passive, it’s also reliable. My drive is just hanging out on top of the NAS. It’s zip tied onto the adapter to prevent it from coming loose.
System Configuration
There are two files you want to edit and luckily for us, the changes in both files are the same. Warning: Don’t copy the files over each other. While they are similar, they are not the same.
You want to change two the two files:
- /etc/synoinfo.conf
- /etc.defaults/synoinfo.conf
Settings and Explanation
In both configuration files of the DS1513+ are the lines:
usbportcfg=”0x3f0000″
esataportcfg=”0xc0″
internalportcfg=”0x1f”
maxdisks=”5″
If you have a different model, your initial configuration will be different.
The *portcfg properties are bitmasks which define which drive will be mapped to which DSM drive management mechanism. What this means is that your drive sda is the least significant bit, sdb is the second after that and so on.
Let’s look at internalportcfg
internalportcfg=”0x1f”
0x1f is the hex value which represents binary 0001 1111. This tells DSM that the first through the fifth enumerated drives (sda -> sde) will be treated like internal drives.
Now, let’s look at externalportcfg
esataportcfg=”0xc0″
0xc0 is the hex value for binary 1100 0000. What we want to is to set all the bits to zero. This will tell DSM that non of the enumerated drives are connected to the eSATA interface and then transfer those bits into the value of the internalportcfg property which will become 1101 1111 or 0xdf.
It is curious that the sixth bit (counting from the right) is a zero. That means sdf is being used somewhere, but it’s not an internal sata or external eSATA drive. That needs to be further investigated.
New settings – All eSATA are now Internal
After migrating the bits from esataportcfg to internal portcfg and updating the number of max disks, what we get is:
usbportcfg=”0x3f0000″
esataportcfg=”0x00″
internalportcfg=”0xdf”
maxdisks=”7″
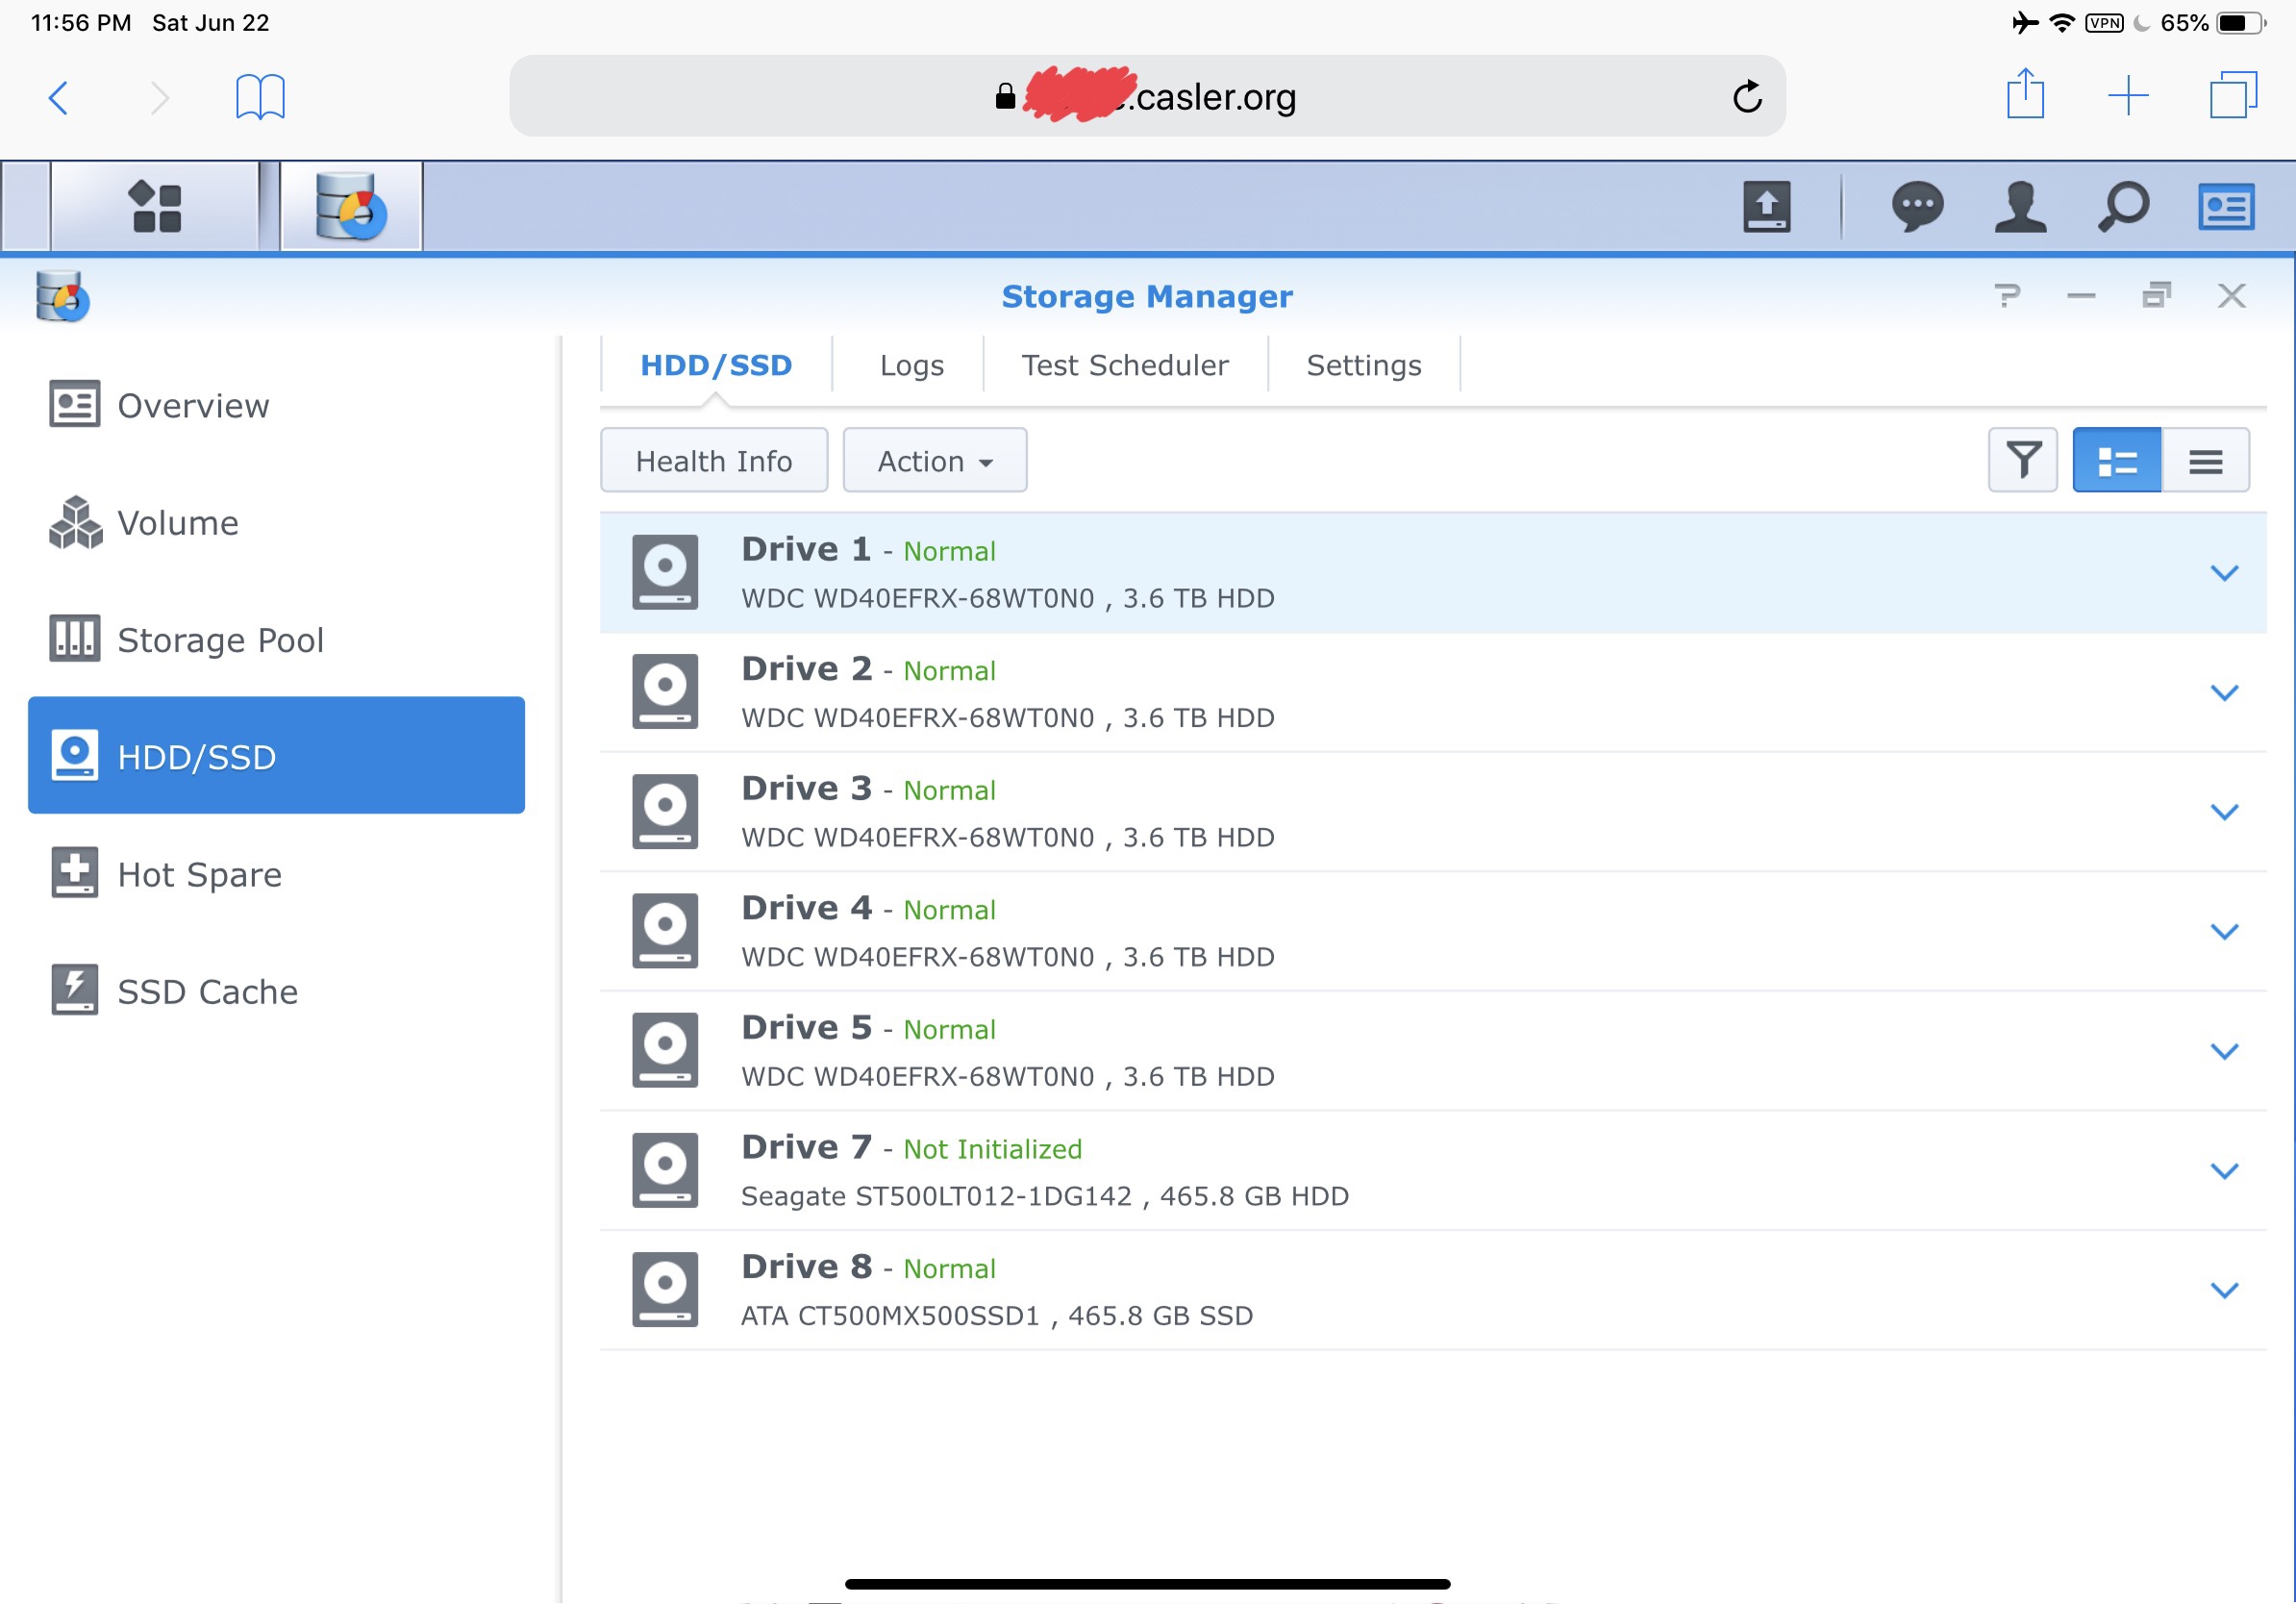
With those changes applied and the Synology NAS restarted, any disks attached to the eSATA ports will be displayed in the UI as an internal drive. You can use this to expand your volume or utilize as an SSD cache.
New Settings – All drives are internal
First off, must say that I have not tried this for any length of time, but it does seem to work. I decided not to stick with these settings, but you’re welcome to try it yourself.
What if you want all enumerated drives to be used as part of your storage volume potentially useable as part of an SSD cache?
usbportcfg=”0x00″
esataportcfg=”0x00″
internalportcfg=”0xffffff”
maxdisks=”24″
That will tell DSM to use the first 24 disks discovered by the kernel as internal drives.
I’m confident that this will lead to data reliability issues, mostly on drives connected to USB. These risks may be acceptable to you.
Final Thoughts

Synology is awesome but some of their product decisions are purely driven by revenue. They have hobbled our ability to connect external drives in favor of their ridiculously overpriced expansion bays.
I’m 100% certain that these changes will void my warranty just as it will void your warranty if you copy them. Luckily, I’ve been out of the warranty for 4 years.
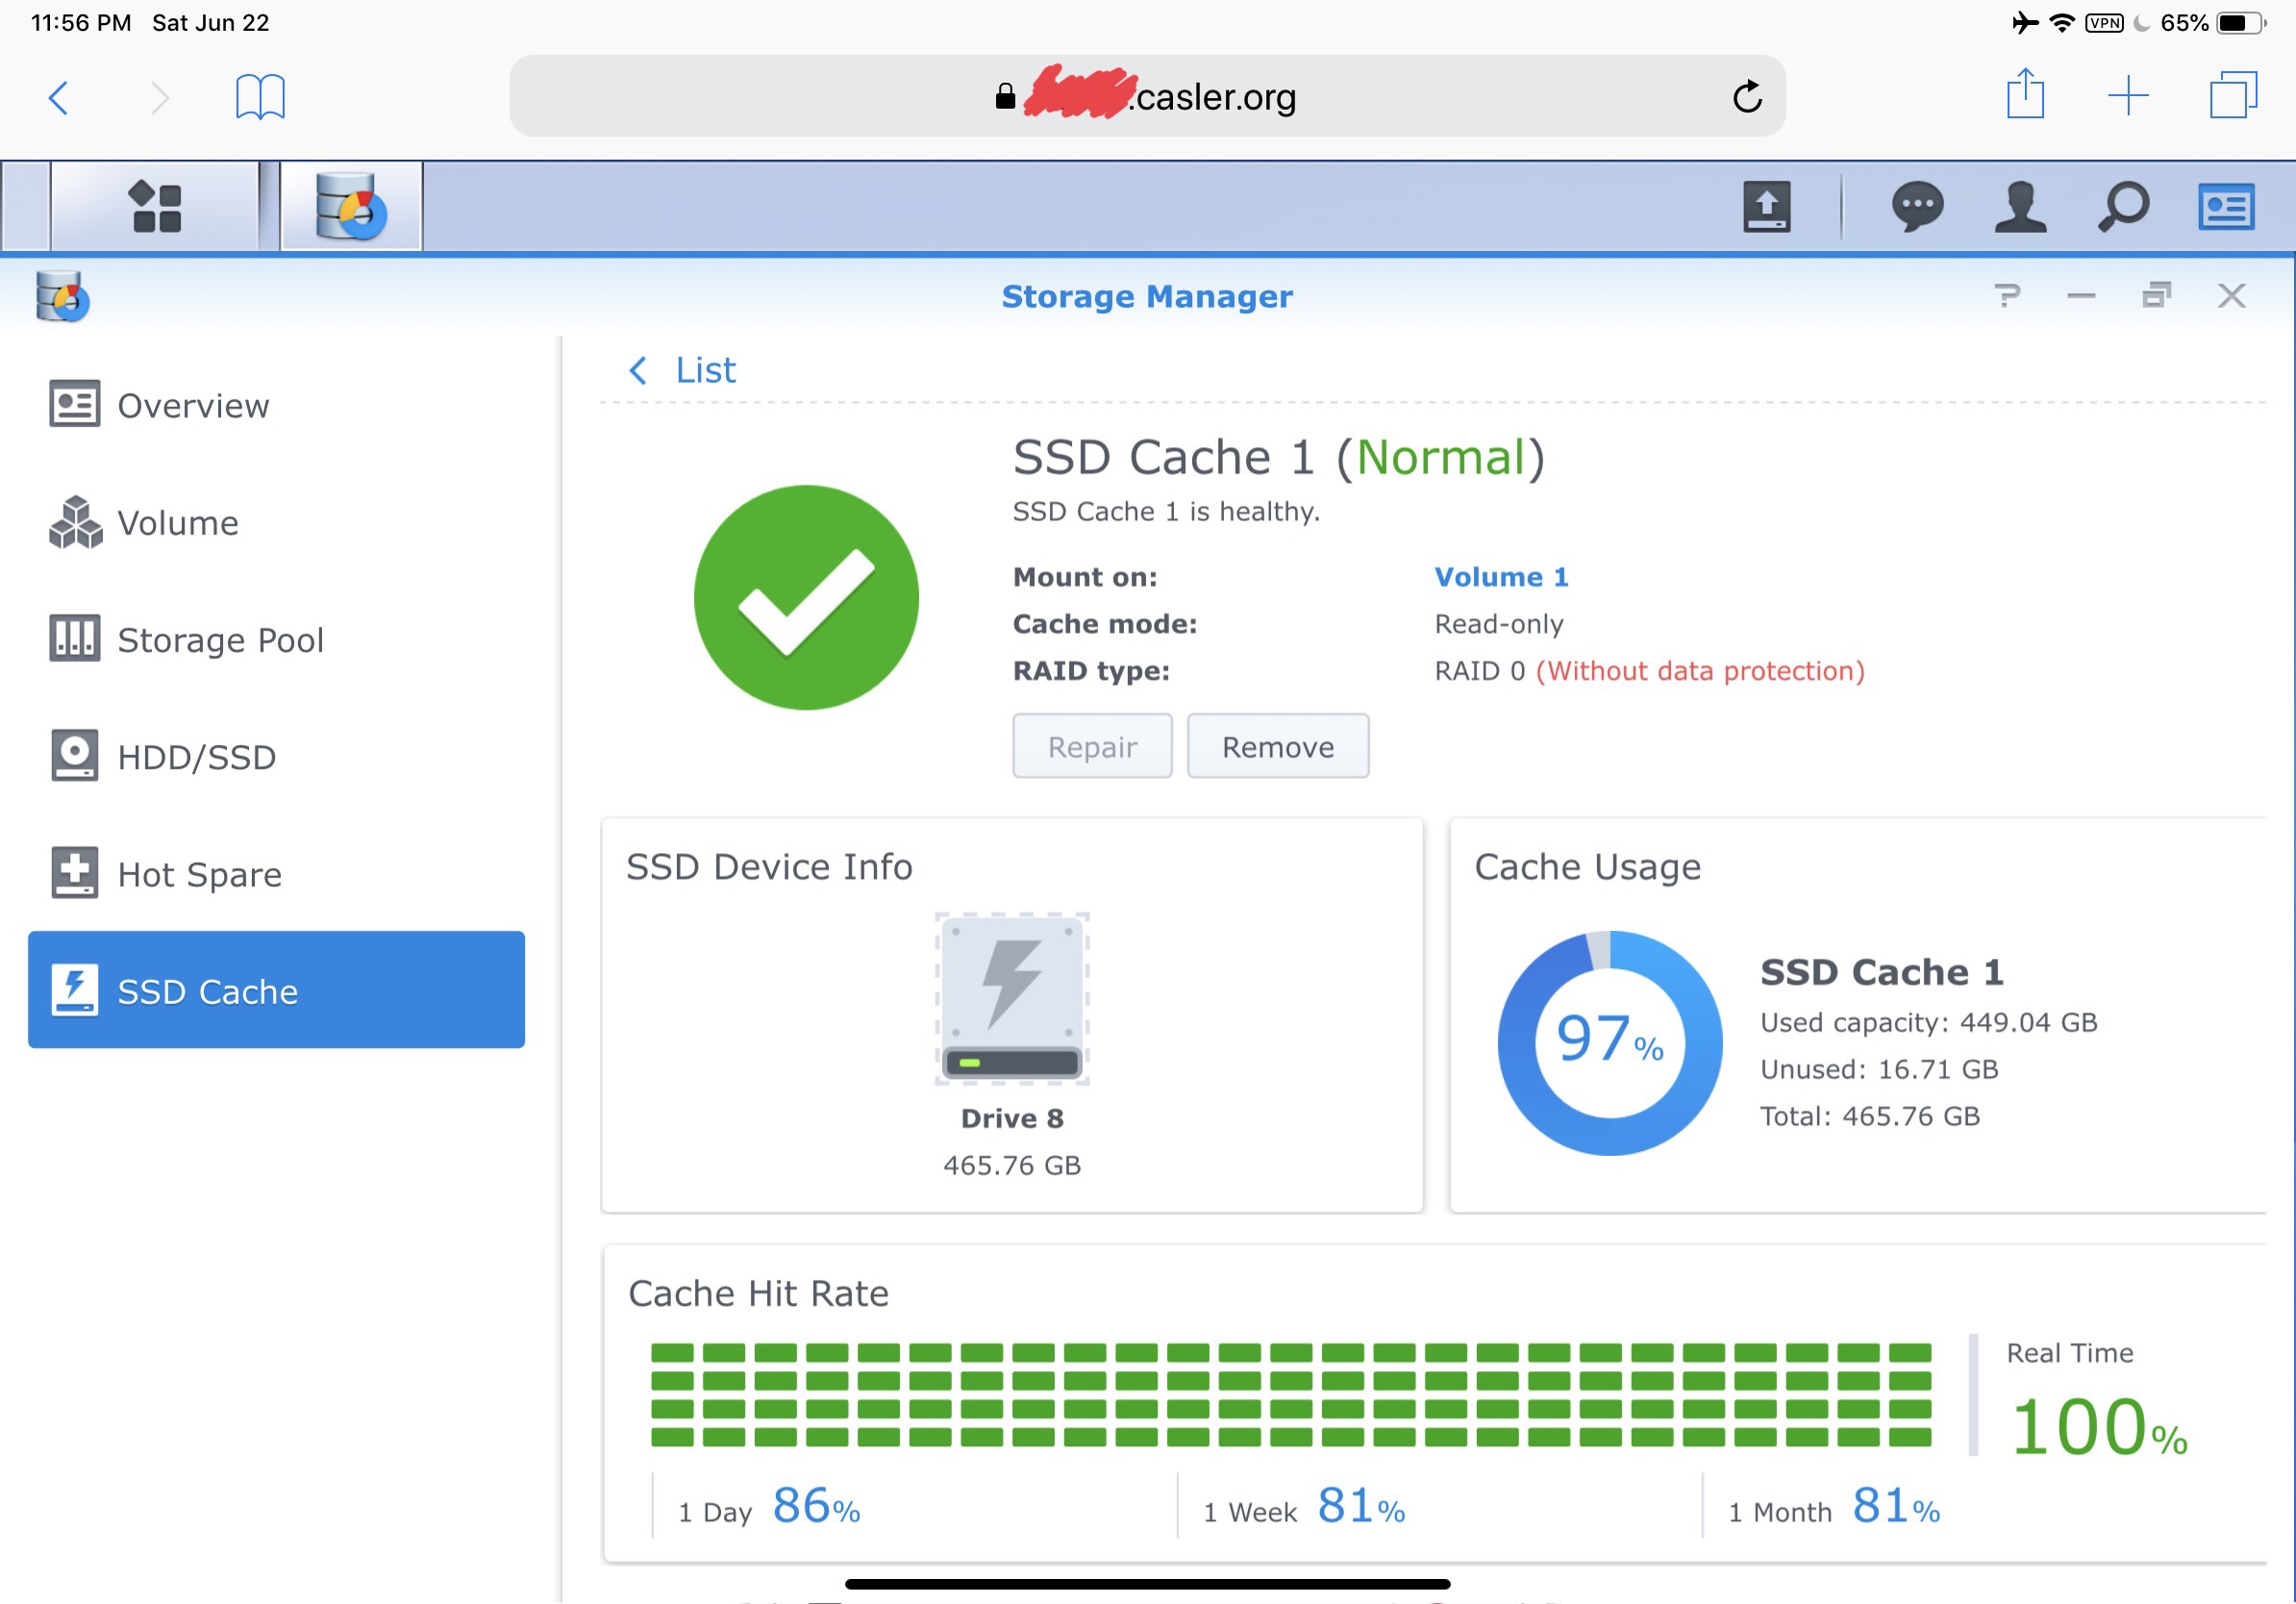
Lastly, I’ve also made the conscious decision to have a read only SSD cache. There is risk in these changes and I’m not willing to extend that risk to a read/write cache. If you have a different threshold for risk than I do, then try this out for a read/write cache and please comment on your experience below.
Cheers!
….
Thank you for digging into this! It works great on my 1513+. I took your findings and tried it with the 218+ and found something interesting. It appears to only use 3 bits to determine which drive does what. So i set the estaportcfg to 0x00 and the internalportcfg to 0x07 to use the 3 bits. What’s good is now it displays 3 internal drives availble. However, it doesn’t provide an option to start the SSD Cache process on the menu! I’ve tried to see if there’s a discrete setting to enable this option, but can’t seem to find one. Curious if you dug around with that.
The option is in the Storage Manager under the header SSD Cache.
Hey Will,
I have a 218+ too, and got to the same outcome. Did you manage to get forward and activate the cache?
Very Very interesting article! I run a DS718+ with two mag drives internally on a RAID1 EXT4 volume. I’m wondering if I were to connect an SSD via ESATA with this mod to the synoinfo.conf files making it appear internal to DSM would it allow me to:
1. Create a BTRFS volume for VMs on the esasta? (DSM does not permit external BTRFS volumes, nor external VMS)
2. Allow the use of the ESATA SSD as a cache drive? Also, do you use your cache drive for your websites? If so, has it helped much with speed?
If you don’t mind confirming the values I would need to change on my 718+ that would also be helpful. If im reading correctly since the 718+ is a 2-bay I suppose this would work:
usbportcfg=”leave_as_is″
esataportcfg=”0x00″
internalportcfg=”leave_as_is”
maxdisks=”4″
This will make all external drive appear to DSM as internal drives?
Thanks!
1 – Yes
2a – Yes
2b – Yes
2c – This WordPress site went from taking 3-5 seconds to respond to a page down to under 1 second.
Start with the examples on the article and then tune it after you get it working the way you want.
usbportcfg=”0x00″
esataportcfg=”0x00″
internalportcfg=”0xffffff”
maxdisks=”24″
I am 100% going to have another go at this once my 10TB RAID finishes rebuilding because this hack is EXACTLY what i have been looking for… Keep my EXT4 10TB internal RAID1 internal, with ESATA SSD for Cache, and a BTRFS volume on a USB stick for non-critical VM’s/ Sandbox fun.
I was using WINSCP as root user to apply the changes to /etc/synoinfo.conf & /etc.defaults/synoinfo.conf maybe pasting the lines with the WINSCP edit tool (rather than keying in the text) did something funky to the characters? Maybe 24 disks is too high of a value for a 2 bay NAS? Any other ideas?
I changed both files to the values you had:
usbportcfg=”0x00″
esataportcfg=”0x00″
internalportcfg=”0xffffff”
maxdisks=”24″
Now my 718+ wont boot and is blinking rapid orange as if DSM is not installed. I tried to reset the NAS with reset button and nothing happened, I just get a beep. I tried hard reset with the button and the same thing happens. The router says its not getting an IP so i cant even ssh back in. I am freaking out man, please help! 🙁
Okay… I almost had a heart attack, though NAS was bricked! (reset button on the back was not working at first). After changing those likes to what you have above my 718+ would not boot. Had to pull one of the RAID1 drives (to keep data safe) and do a hard reset DSM/reinstall on the other drive to get the unit back up, luckily it treated it as a “migration” so all my packages, websites, and dbs are in place. The DSM migration procedure reset both synoinfo.conf files and all is well now. WTF happened? I almost shit myself thinking of how long i would have taken to setup from scratch.
I think that for NAS with 2 or 4 bays these values won’t work, hope jm can help us
Hey JM,
I noticed below that Paco had a similar problem to me (had to reinstall DSM after changing vales on his 2-bay). I just wanted to comment back with my values to see if you had any input on what you think they should be. Being this is a 718+ I’m fine with the max drives value being 4 or 5 (2 internal, 1 esata, 1-2USB). Anyhow, here is more information:
The Original Values were scattered in thoughout the synoinfo.conf file. Here is what they were before the crash and subsequenbt DSM reinstall (from a backup I made before the crash):
internalportcfg=”0x3″
usbportcfg=”0x30000″
esataportcfg=”0x0″
maxdisks=”2″
I changed them in both files to:
usbportcfg=”0x00″
esataportcfg=”0x00″
internalportcfg=”0xffffff”
maxdisks=”24″
NAS would not boot. Orange LED blinking indicating “no DSM” ( or could not find disks?) Used reset button on the back to do a hard reset. After the DSM reinstall, the values are no longer in the middle of the file, the ones i edited are all neatly at the BOTTOM of the synoinfo.conf file and they are now:
# Fixed items
internalportcfg=”0x3″
usbportcfg=”0x70000″
esataportcfg=”0x4″
configured=”yes”
However, maxdisks=”2″ is still at the top of the file under
# service limitations
Maybe Synology caught on to this and what we were trying to do and made DSM auto detect this and fore re-install? (They much prefer we pay for lame external “expansion”)
I REALLY want to get this working. It would make the 2-bay units SO much more capable!!! Thanks so much for all your work on this so far! Feel free to email me if you are interested and would like to connect remotely to take a look around 🙂
I tried internalportcfg=”0x3″ (no change) usbportcfg=”0x00000″ esataportcfg=”0x0″ maxdisks=”4″. These settings stuck, and the 718+ rebooted fine, but external USB devices are still being seen as external (not internal) drives.
Any other ideas?
Check the binary values for the hex values.
You need to do this:
usbportcfg=”0x0″
internalportcfg=”0x7″
esataportcfg=”0x0″
Since:
0x3 = 0000 0011 (both internal bays)
0x4 = 0000 0100 (third port is esata)
0x7 = 0000 0111 (all those ports together)
Works fine on my 716+
Correction, leave usbport as is!
usbportcfg=”0x70000″
Hello,
I have a DS916+, I’m following your guide but I’m having a trouble: when I restart the Nas, it changes maxdisks from 7 to 4 in both files. I tried to change it to 6 but DSM got broken and I had to reinstall it. Is there anything I can do?
Did you change the synoinfo.conf in both locations?
Yes I did.
This are the default values for both files:
maxdisks=”4″
esataportcfg=”0x40″
internalportcfg=”0xf”
usbportcfg=”0x70000″
I did more tries and wasn’t successful. Something strange happened because after reinstalling DSM esata went to 0x10. I tried 8f and 1f for internal and no one worked. I think the problem is going from 4 to 5 disks, maybe there is something else I have to change but don’t know what.
Okay, so i figured it out.
1. Don’t copy paste values from this site, the “” characters don’t copy over well (I did not notice the first time around lol). Key in your own values.
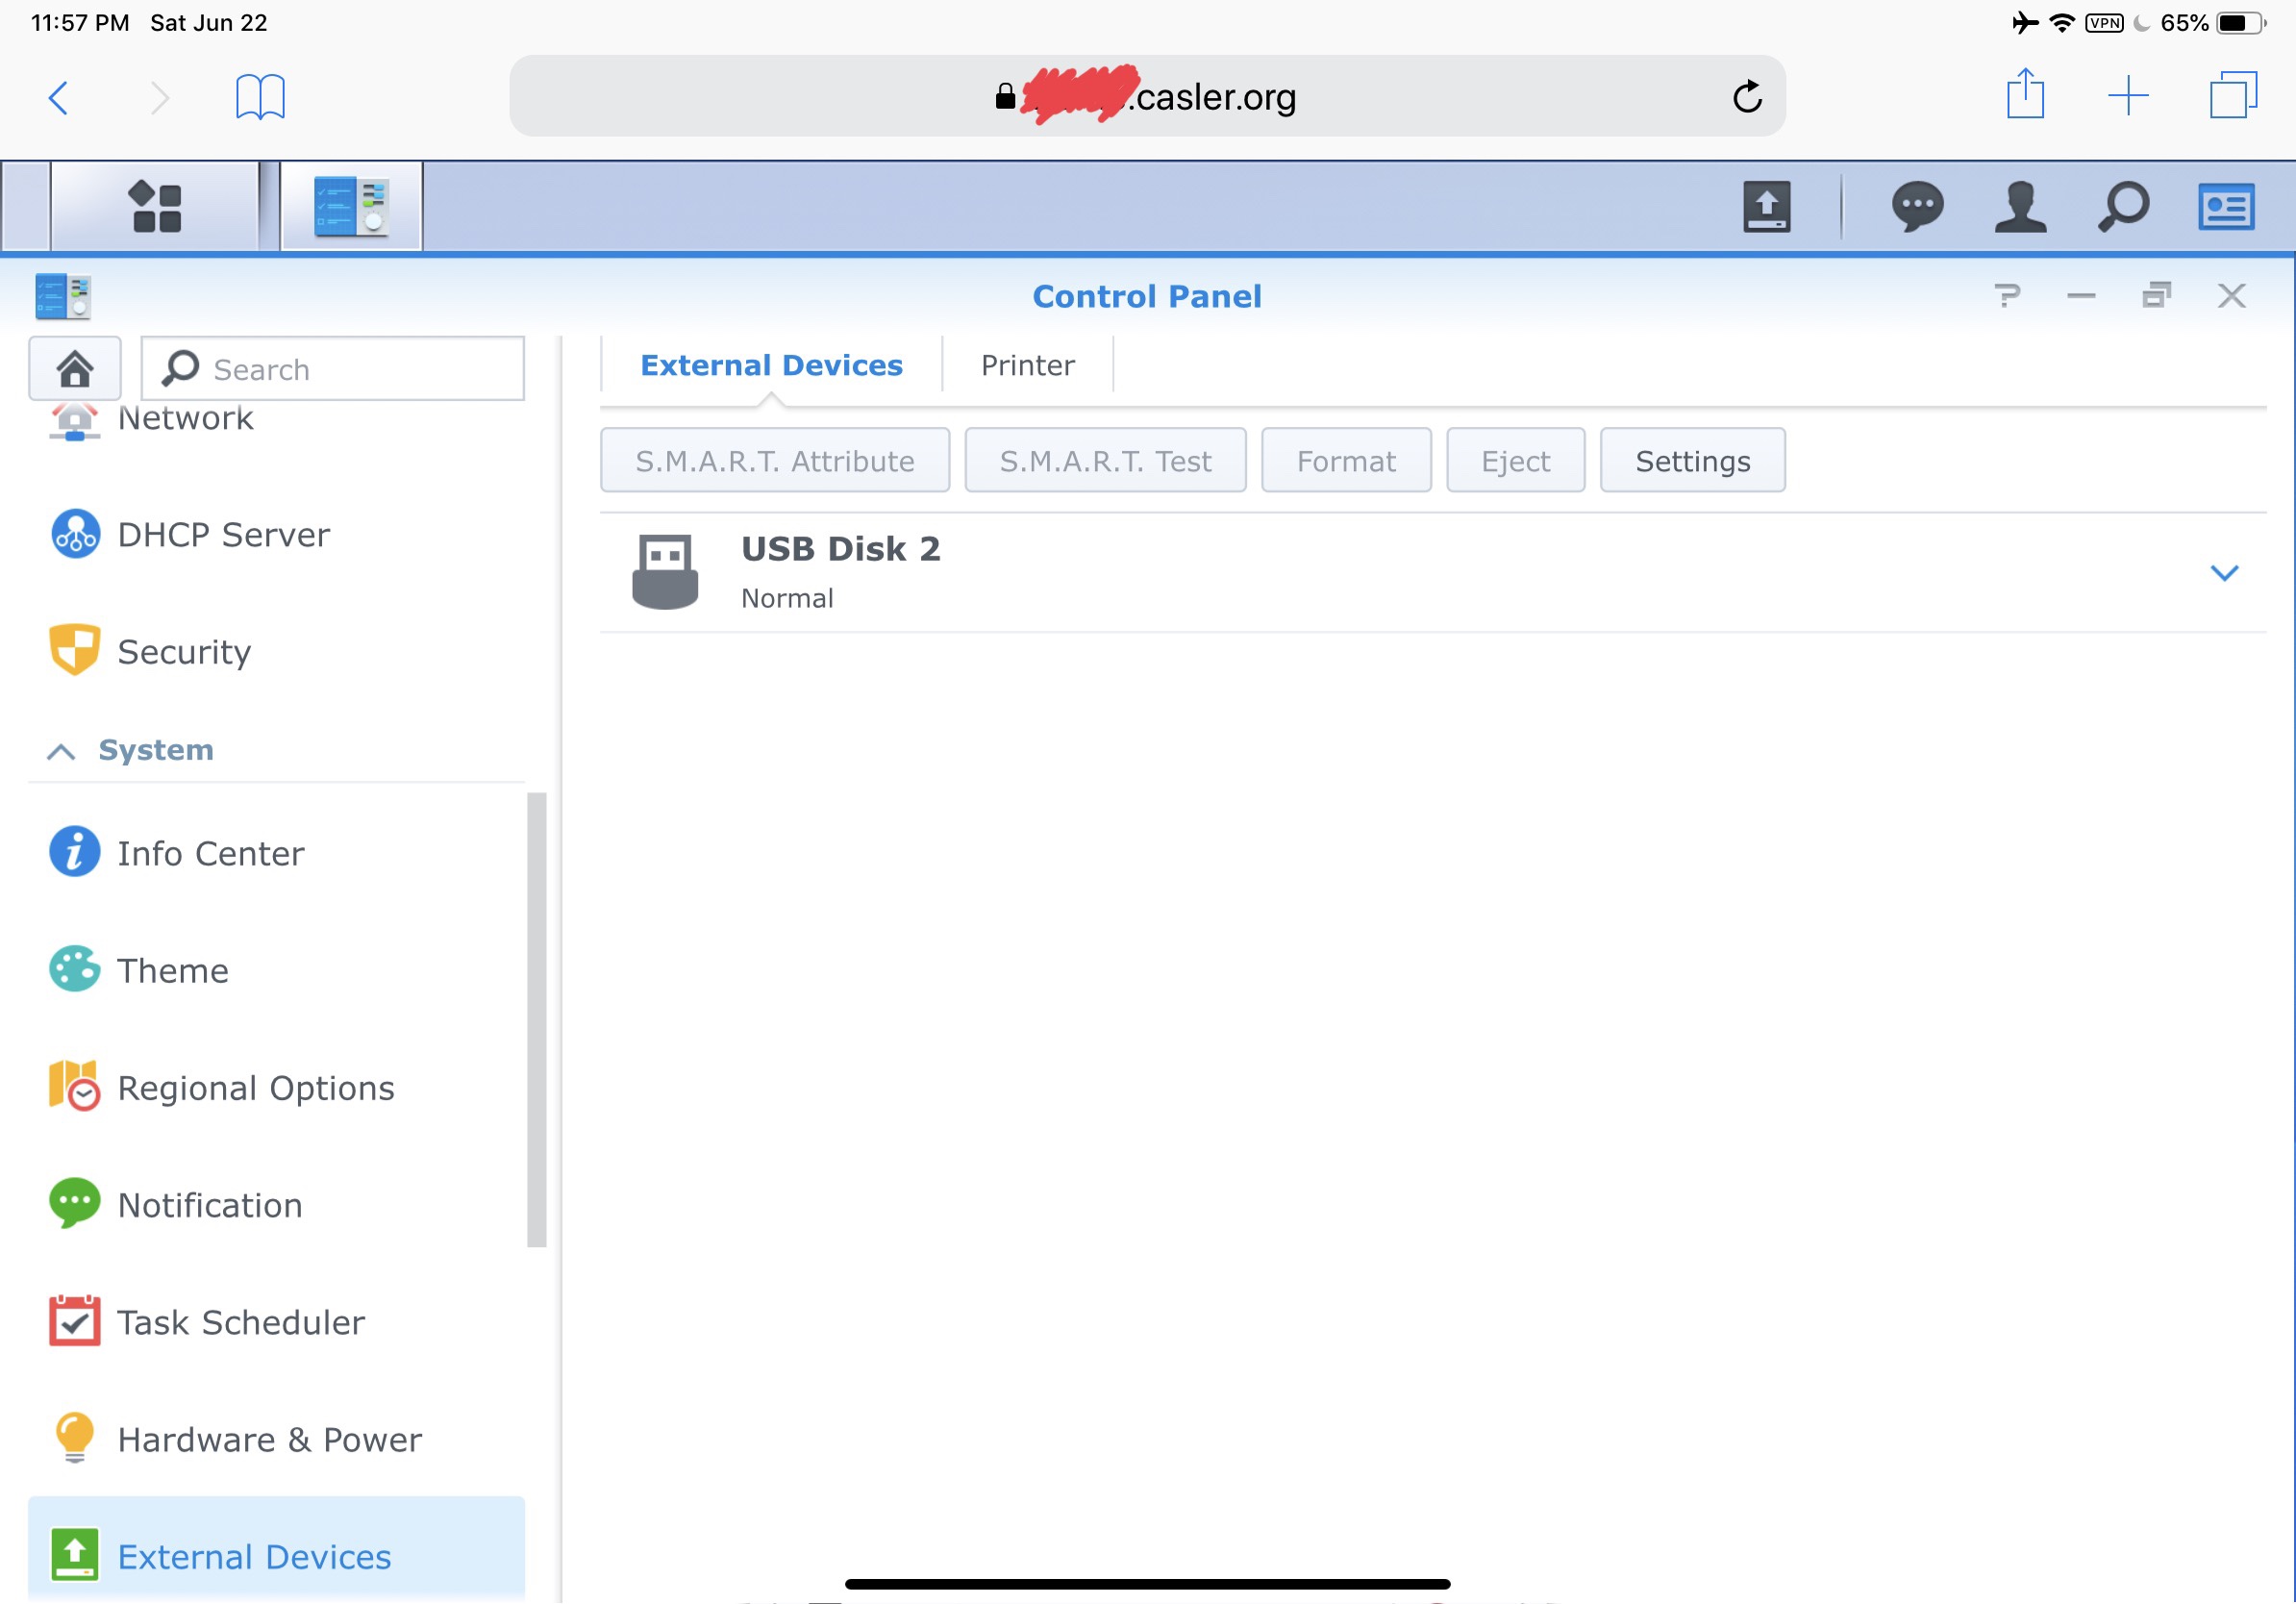
2. If you want USB devices to be seen as internal you MUST use 24 as the disk value. Smaller values are not reliable. Reason: DSM assigned high volume numbers to USB devices, ex: I plugged in a USB key and it came up as “volume17”
3. I set my 718+ as maxdisks=3 (2 internal and one exta for ESATA I left USB as-is for now, they still function as originally intended in DSM. You can use this tool to help you make your own internalportcfg value – https://www.rapidtables.com/convert/number/hex-to-binary.html
The main reason i did this was to add ESATA SSD cache to my RAID1 internal 10TB array. The main goal was to speed up page loading on my website. After adding SSD cache I’m sad to report i see NO change in page loading speed (and my Google Insight score has not changed. Any ideas on why you saw such a speed increase and I have not? My NAS has 16GB RAM. The only difference I can think of is that i’m running ext4 file system (i’ll bet you are BTRFS). What gives? Is there a way to force the website files to pull from the SSD cache? Does the cahe need to “warm up”? Would I be better off using the Esata to make a BTRFS volume2 and move all of my packages onto the SSD volume?
-Stumped
Hello oRIDDLERo,
Could you tell me the exact values you entered? I have an 716+ ii (2 disks) and i also need just the esata working, cause i want to use it for an ssd cache drive.
Thanks a lot
What parameters did you leave?